Check out how you can make a simple popsicle stick catapult with materials you probably already have at home. Here are 3 tried and true catapult designs that are easy to build and test. It’s a fun STEM project that you can do with your kids indoors on a rainy day!
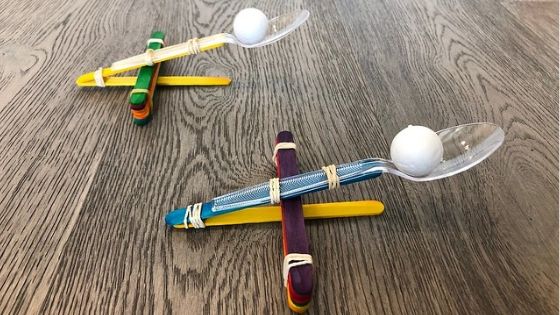
Do you have popsicle sticks or craft sticks somewhere in the house? If you are a parent of a toddler or preschooler, I bet you do.
One day, I saw in a magazine instructions for making a catapult with popsicle sticks, rubber bands, and a spoon. How fun! I went home and built it right away.
Then I started experimenting with different ways to build the popsicle stick catapult to make it shoot farther and more powerful. The engineer in me couldn’t help it.
Here are 3 simple DIY popsicle stick catapult designs that you can build with your kids with materials you have around the house.
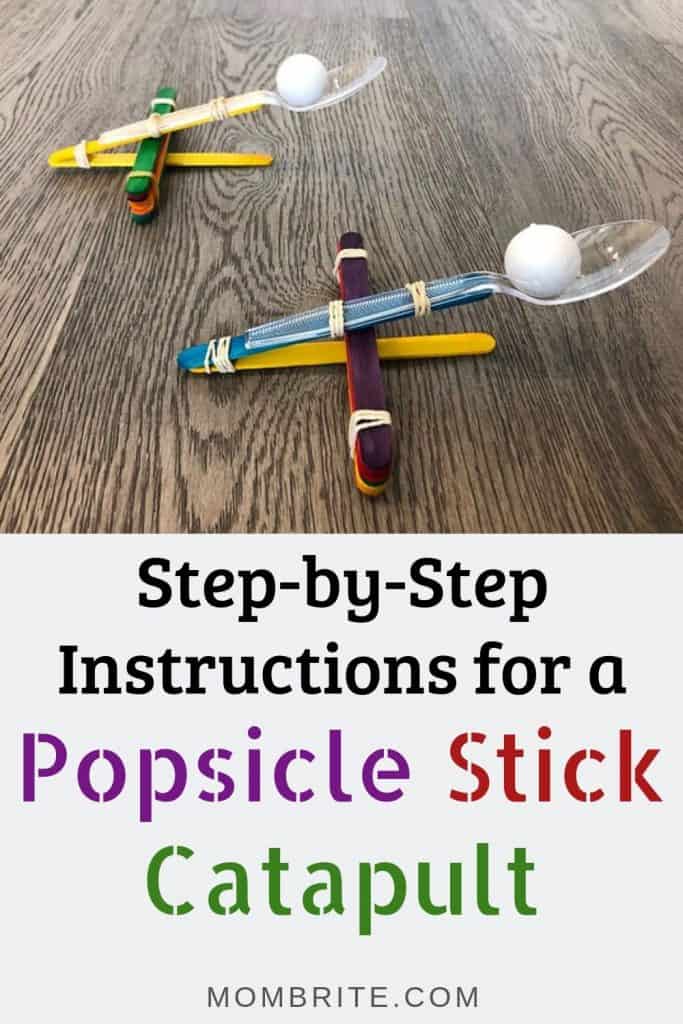
Design 1: Catapult with Popsicle Sticks, Rubber Bands, and Spoon
Materials:
- Popsicle sticks (or craft sticks)
- Rubber bands
- Plastic Spoon
- Styrofoam Balls (or Pom Poms or marshmallows or anything that fits in the spoon)
Directions:
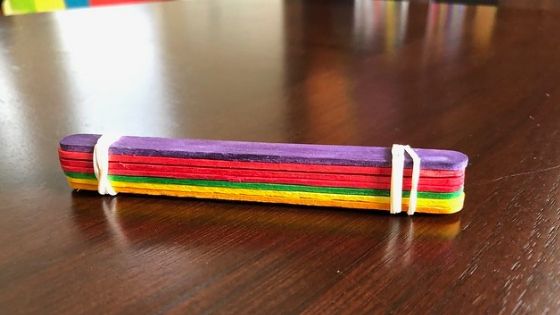
1. Make a stack of 7 popsicle sticks and use rubber bands to tie them together on both ends.
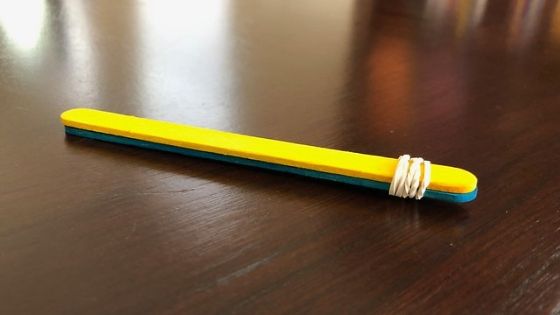
2. Make a stack of 2 popsicle sticks and use a rubber band to tie them together on one end only.
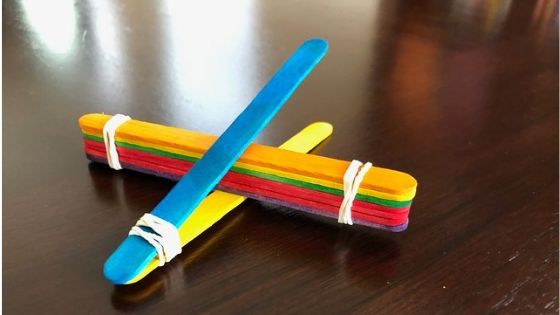
3. Pull the 2 popsicle sticks apart and wedge the stack of 7 popsicle sticks between them.
4. Use two rubber bands, secure the plastic soon to the upper popsicle stick.
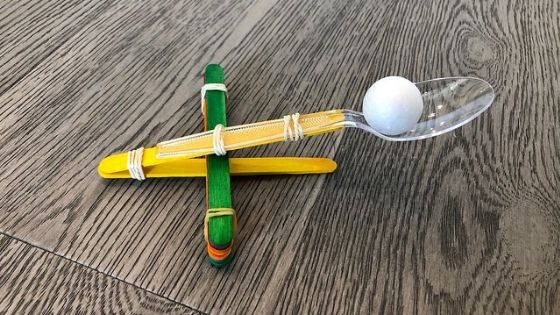
5. Place the ball onto the spoon.
6. Hold the catapult with one hand, use the other hand to push down the spoon.
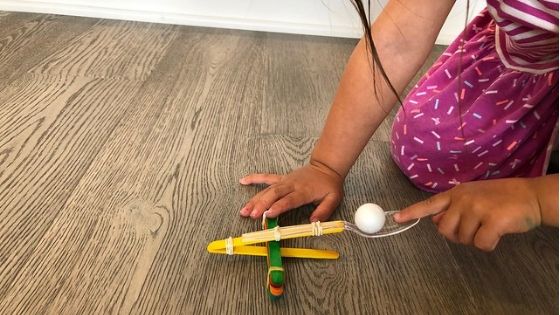
7. Release the spoon and watch the ball fly!
Design 2: Catapult with Popsicle Sticks, Rubber Bands, and Bottle Cap
This popsicle stick catapult design is very similar to the one above, except you are replacing the spoon with the bottle cap. To do this, you need a hot glue gun and a cap from a water bottle or sports drink bottle.
Simply hot glue the bottle cap to the end of the popsicle stick where the spoon was from the other design.
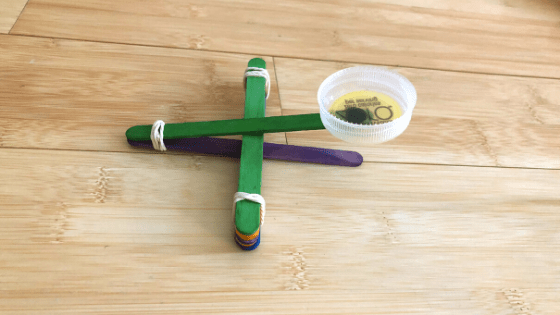
With the bottle cap, the catapult felt more stable. I also like it because you can put different objects in the cap and not risk having them fall out since the cap is deeper than the spoon.
However, since the spoon extended the arm of the catapult, the catapult with the spoon could shoot farther. The catapult with the bottle cap seemed to shoot higher, but the horizontal distance of the projectile was shorter.
Design 3: Catapult with Popsicle Sticks, Binder Clip, and Bottle Cap
Materials:
- Popsicle sticks
- Binder clip
- Hot glue
- Bottle cap
Directions:
1. Form a triangle with 3 popsicle sticks and glue the ends together.
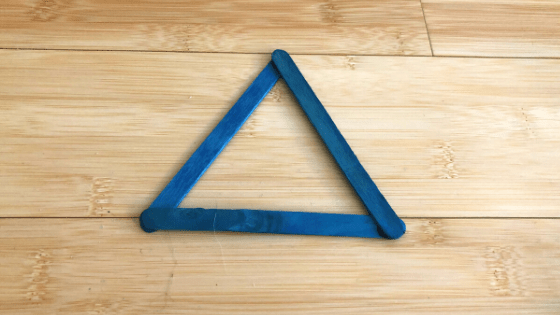
2. Glue one popsicle stick to one of the points of the triangle and glue the other end to where it bisects the opposing side.
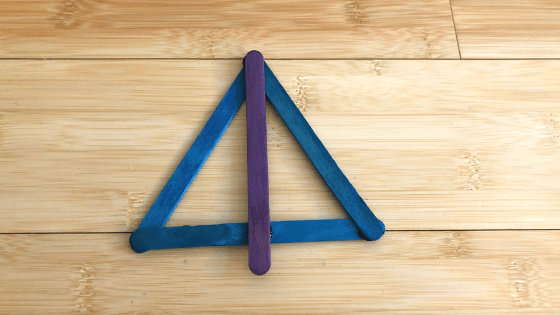
3. Glue the binder clip to the end of the top popsicle stick. I used extra glue around the metal part of the binder clip to make sure it will stay attached to the popsicle stick.
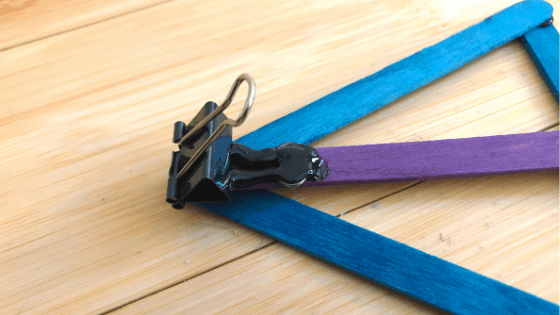
4. Glue a popsicle stick to the top of the binder clip. Again, I applied extra glue to the metal part of the binder clip.
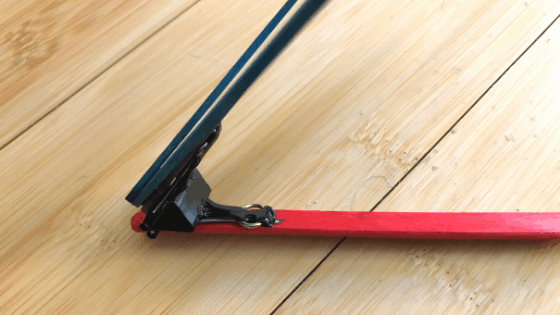
5. Hot glue the bottle cap to the other end of the popsicle stick.
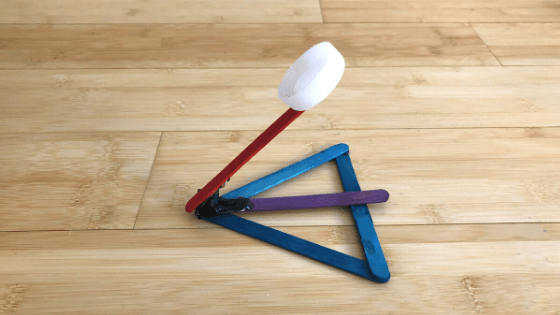
This popsicle stick catapult design is simple yet effective. With just a little pressure on the bottle cap, you are able to really launch the projectile far.
The downside is that you need to use hot glue, so preschoolers or kindergarteners, or even elementary school kids can’t build the popsicle stick catapult independently. If you are looking to do this activity with a group of students in a classroom, then the first catapult design with rubber bands is the way to go.
The Science Behind the Popsicle Stick Catapult
The biggest benefit of STEM projects is that you can show your kids the science visually, which helps them understand the concepts. That’s how I learned physics at school!
You probably heard of Newton’s Three Laws of Motion (source):
- An object at rest stays at rest and an object in motion stays in motion with the same speed and in the same direction unless acted upon by an unbalanced force.
- When an external force acts on a body, it produces an acceleration (change in velocity) of the body in the direction of the force.
- Every action has an equal and opposite reaction.
You can explain to your child how without touching the catapult, nothing happens. The ball is not going to launch itself without you applying force.
When you pull back the spoon and let go, you overcome the ball’s inertia and fling the ball into the air. The force of the spoon exerted on the ball produces acceleration upward and makes the ball fly into the air. The action of letting go of the spoon causes the reaction of the ball getting launched.
You can also explain to your kid that because of gravity and air friction, the ball was pulled down to the ground instead of flying in the air forever. Then, when the ball hit the ground, it bounced and rolled until the friction of the floor eventually stopped it.
If you have preschoolers, Newton’s laws may be a little complicated for their minds. However, you can always try to explain everything in simple terms and start introducing the concept of force and motion to them. You never know what they absorb and remember!
Popsicle Stick Catapult Activities
There are so many fun activities you can do with a popsicle stick catapult! You will find that your child may come up with his own ideas, but here are some to get you started:
Attack the Castle:
Build a castle with some lightweight blocks or even LEGO bricks (without snapping the pieces together). Hurl balls at the castle and blast the castle wall open! Just make sure the blocks are not too heavy so that the balls have enough force to knock them over.
Go the Distance:
Make multiple catapults and see who can launch the ball the farthest!
You can make multiple catapults using the same design, or you can make one of each catapult design. It would be interesting to see which design shoots the farthest.
This is an excellent opportunity to walk your kids through the scientific method. Which catapult design do they think will be the best at launching the ball? Make sure to ask them why they think so, and take the time to measure and write down the distances when testing the popsicle stick catapults.
True Aim:
This one is difficult, but fun at the same time! Place a bunch of cups on the floor. Have your child fling the balls at the cups and see how many balls land in the cups!
Switch It Up:
Try different objects with different weights and dimensions. Do heavier objects go farther? How about flatter objects? You can even try chucking a slime ball (provided it’s not too sticky) at the wall or glass door and watch the slime ball go “splat!”
Final Thoughts on the Popsicle Stick Catapult Designs
I hope you and your kids have lots of fun with this popsicle stick catapult activity! I love how it’s mess-free, and I didn’t have to run out to the store to buy any materials to build the catapults.
And if you are finished playing with the popsicle stick catapults, you can always take them apart and use the popsicle sticks for other crafts or projects! Even the catapult designs that use hot glue could be salvaged for parts by simply cutting off the section that has the hot glue.
Then you can use the popsicle sticks for this easy popsicle stick rainbow craft or a simple DIY popsicle stick bird feeder to welcome the spring.
Popsicle sticks are also great for making Christmas crafts like a gingerbread man or the Polar Express train. We always have a bunch around for last-minute craft activities.
Did you try this popsicle stick catapult project with your kids? I would love to know how it turned out! Let me know in the comments.

thank you from to Kalkie SS girls from class 6K. from Opti-Minds
I am glad you enjoyed it! 🙂
Thank you!
Ty for all this wonderful information 👌😀. My husband and I have been saving popsicle sticks for about 5 years , can’t wait to do this with our 9 grandkids 💖
aw that’s so sweet of you!
cool
haha it is pretty cool 🙂
hi 🙂
I used the simple popcycle catapult for preschoolers They loved it. I glued I glued a small cow to a pingpong ball and had moon for the childen to “jump” over (Hey, Diddle Diddle) Thx for posting
I asked how do you think the cow got clear to the moon. One girls reply wat that it jumped really really high on the tampoline
omg that’s adorable! I love that you used it for the Hey, Diddle Diddle song!
very helpful thanks Betty!
Thanks for reading! 🙂
thank you it reallt helped
Hello, Betty
I used this as a project on the laws of motion in science. Prof. Wood thought that this was a very creative idea.
On the Contrary, I’m a High schooler and when I told my Boyfriend about how I got the idea. He laughed historically at it considering it was a preschool craft.
Anyways Good Day and thanks
– N.S
haha hey if he thinks it’s a preschool craft, can he do it without directions? :). I am glad you were able to use this for your class!
Thank you for your efforts, Ms. Engineer
Thanks! 🙂
I thought it was a neat activity as I made it with my 4 year old. He liked counting the sticks and helping put it together. But the sticks kept slipping when trying to use the catapult.
Love it though!
I am glad you like it! It’s hard to get the sticks to stay together unless you use tiny rubber bands. I use my daughter’s mini hairbands and they work well!
Instead of using a binder clip can we replace it with paper clips? Will it work the same?
I don’t think it will work the same, the paper clip doesn’t bounce back like the binder clip. You can always experiment!
Using this for my homeschool co-op class that I’m teaching!
that’s awesome!
Thanks! We made these in my fifth grade class last year during our Christmas party using the first option. I plan on making them this year as well, they were a big hit!
we are learning newton’s 3 laws of motion in seventh grade and this was very helpful!