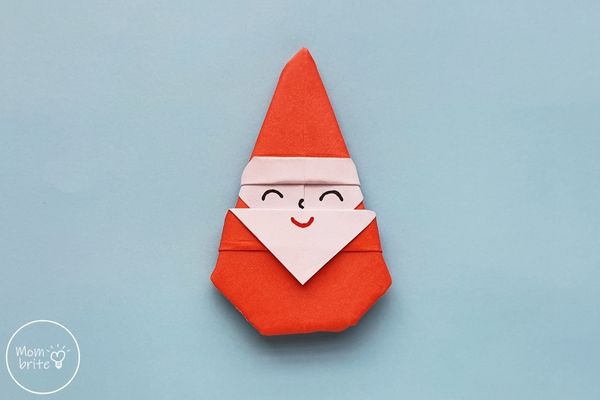
If you are looking for a fun Christmas craft that your kids can make, then check out this easy origami Santa! Your kids will love decorating the house for the holidays with their own paper Santa Claus.
Origami and paper folding help develop hand-eye coordination and fine motor skills and improve focus. And with so many things going on during the holiday season, an origami Christmas project is a great way to keep your kids busy while stimulating their brains.
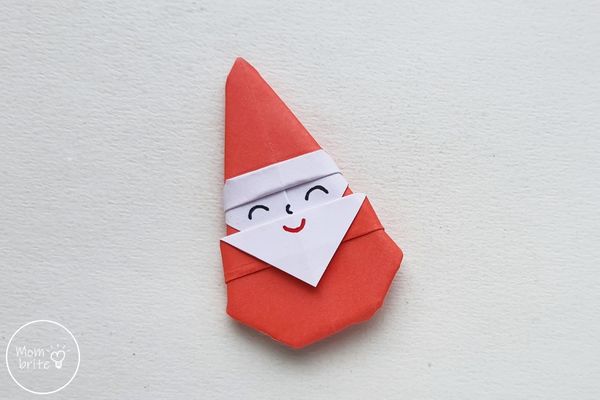
If your kids believe in Santa, then they will adore this Origami Santa Claus. After you finish folding the paper Santa, you can decorate it and draw the Santa’s face.
Throw on your favorite Christmas movie (we love classics like The Polar Express!), grab some construction paper, glue stick, and your favorite markers or crayons, and get busy folding!
How to Make Origami Santa Claus for Christmas
Materials:
- Red and white square pieces of paper (we are using 10″x10″ paper)
- Glue (optional)
- Black marker or Sharpie
Instructions:
1. If possible, use a piece of colored craft paper or origami paper with red on one side and white on the other side.
You can also glue a piece of red and a piece of white craft paper together to prepare the paper for this Christmas craft.
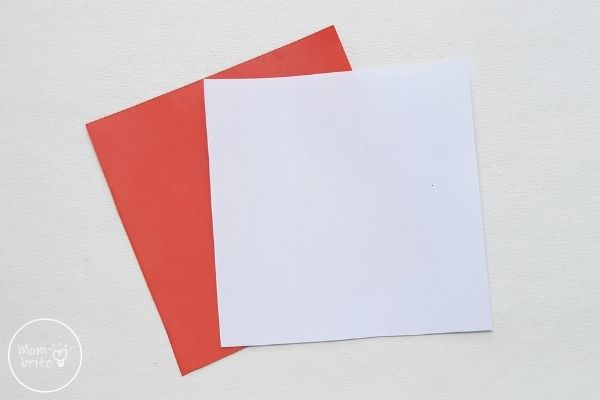
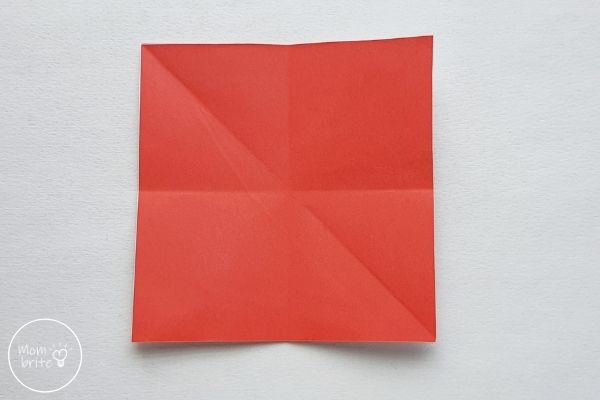
2. Place the paper on a flat surface with the red side facing up.
Fold the paper in half diagonally on both sides to create the diagonal creases. Fold the paper in half vertically and horizontally as well to create creases.
Unfold the paper completely.
3. Flip the paper to the white side.
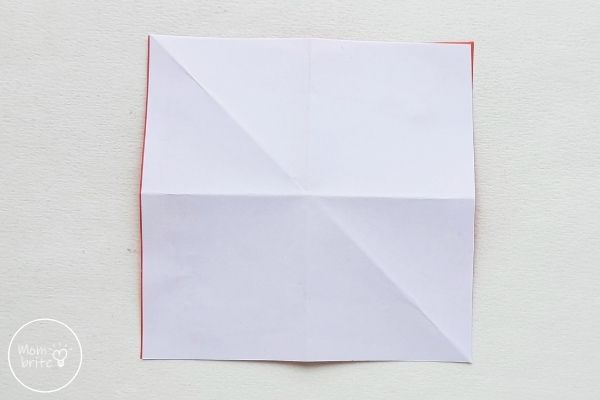
4. Fold the bottom edge up and align it with the central horizontal crease. Unfold.
Fold the left edge to meet the central vertical crease and unfold.
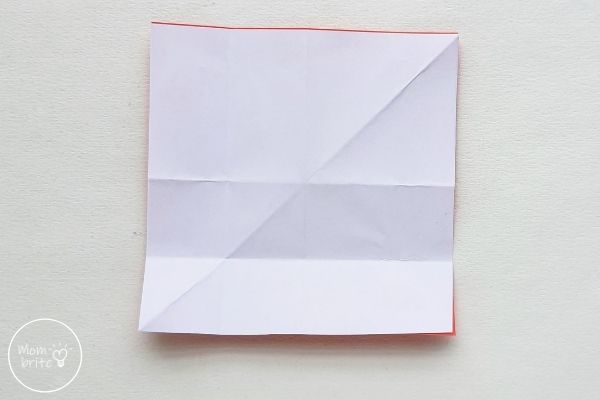
5. Flip the paper to the red side and rotate it so the creases are toward the bottom.
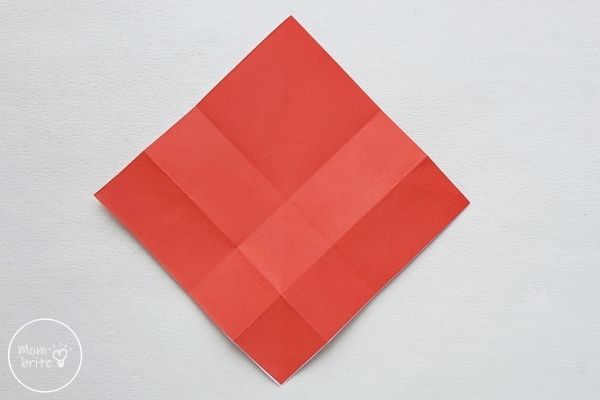
6. Fold in the bottom corner (with criss-cross crease lines) upward and join it to the center of the square paper. Unfold the last fold.
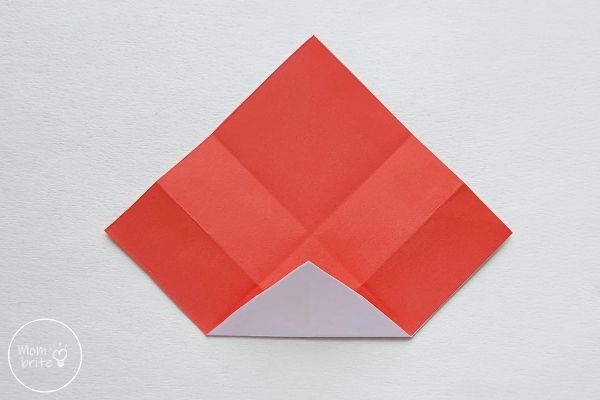
7. Now, fold in the bottom corner and join it to the last crease line (from step 6). Unfold the last fold.
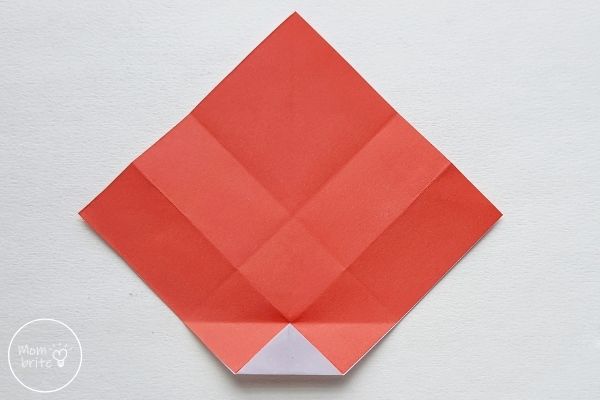
8. Fold in the bottom corner and join it to the last crease line (from step 7). Do not unfold.
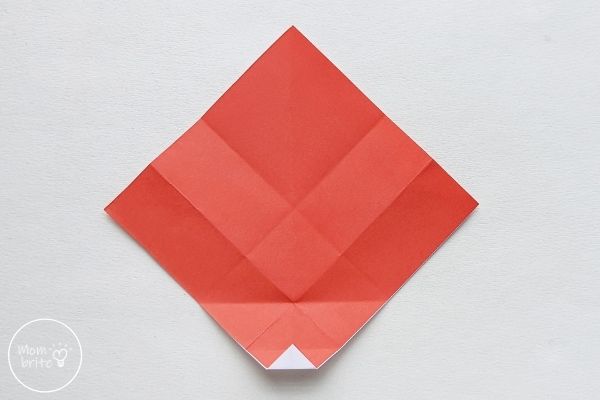
9. Fold the bottom edge upward and align it with the crease formed in step 7.
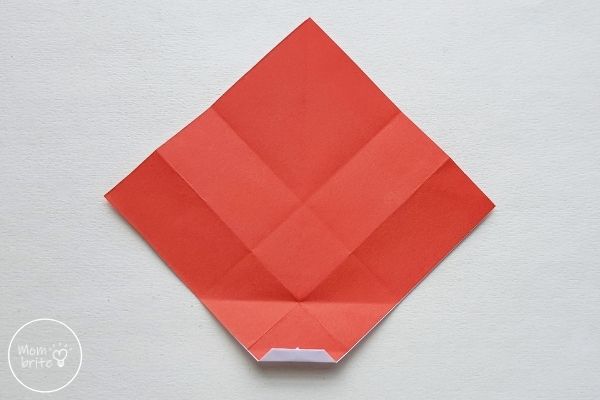
10. Flip the paper over to the white side.
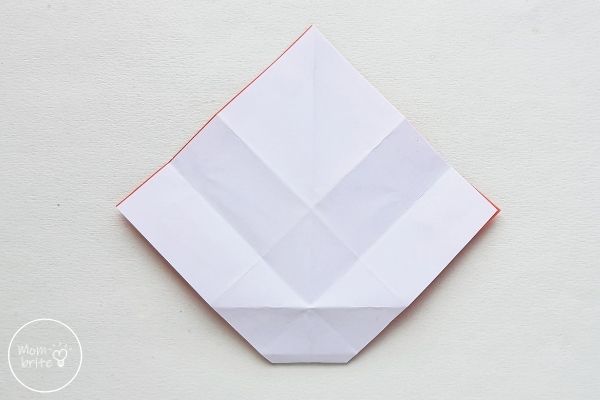
11. Make folds along the creases created in step 4. The folds will intersect on a point along the crease created in step 6.
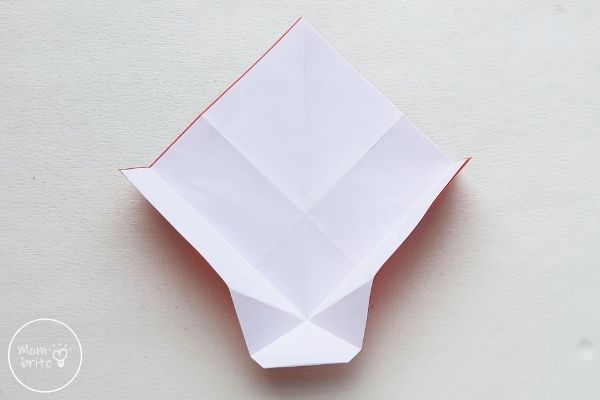
12. Fold along the step 6 crease and carefully flatten it with the paper. This will flatten the left, right, and bottom sides of the current pattern as well.
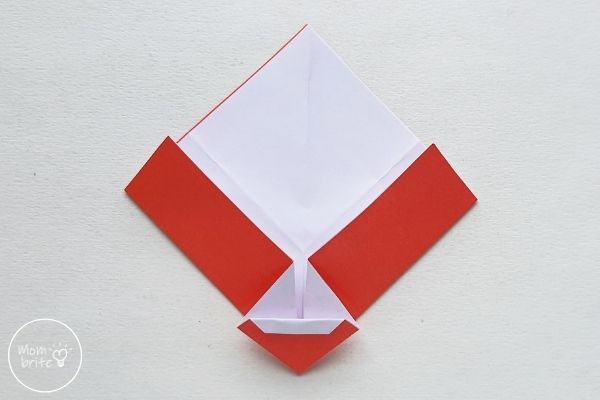
13. Bring the top corner of the current pattern to the bottom corner.
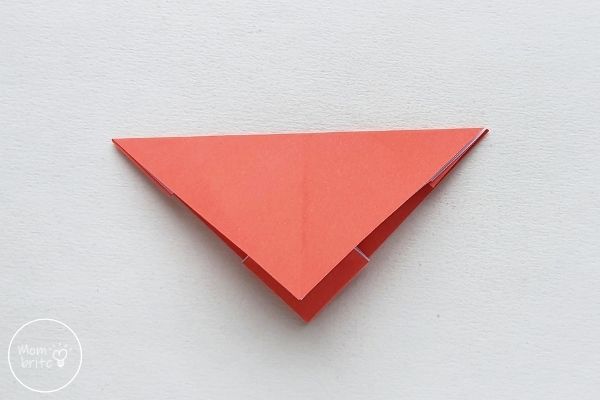
14. Fold the bottom corner of the top flap to the outside, this will bring the white side to the front. Make sure that you can see about 1 cm of the white part of the bottom flap.
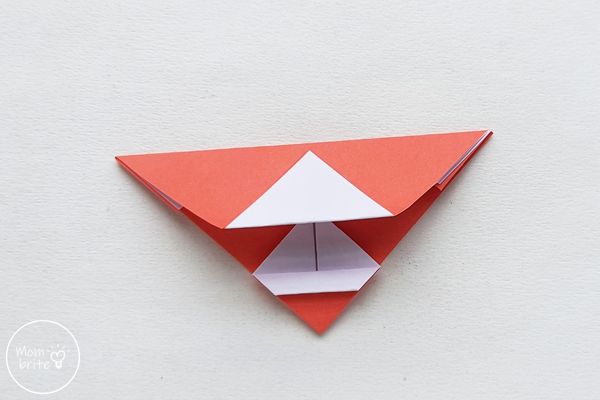
15. Rotate the current pattern to 180 degrees so that the triangle is now upright. Fold 3/4 of the top white triangle upward.
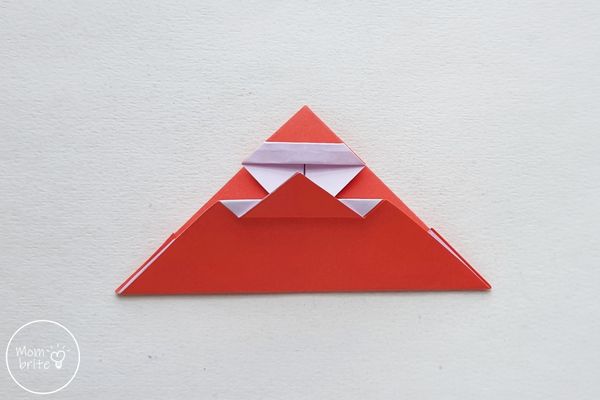
16. Now take the triangle you just folded in the previous step and fold it down so that the bottom of the upside-down triangle runs along the bottom of the upside-down triangle you made in step 14.
The small white triangle will be the beard of the origami Santa Clause.
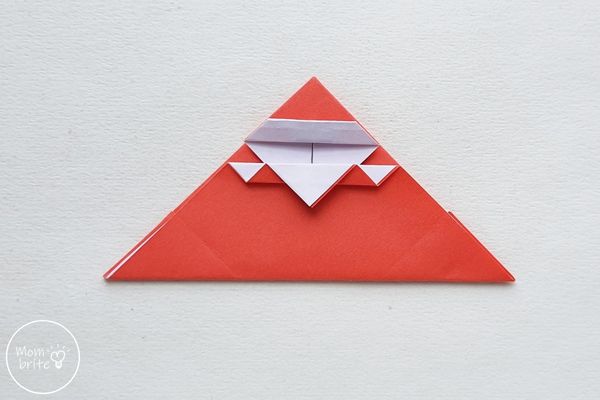
17. Flip the paper to the other side.
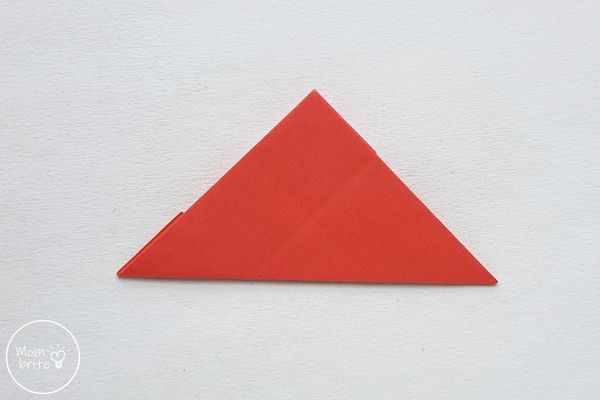
18. Fold the right and left corners to the top corner.
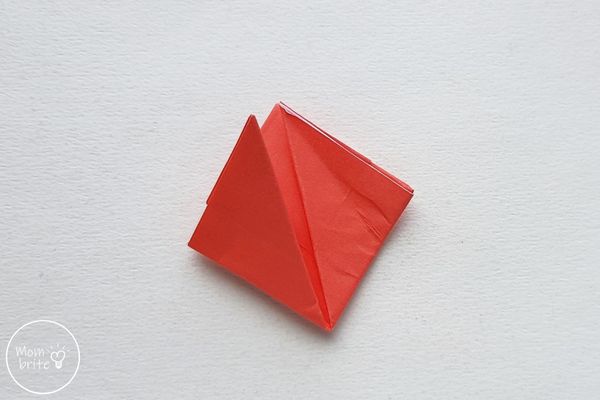
19. Fold the top right side and the top left side toward the inside, aligning them with the middle line of the current pattern. Apply glue to secure this fold if necessary.
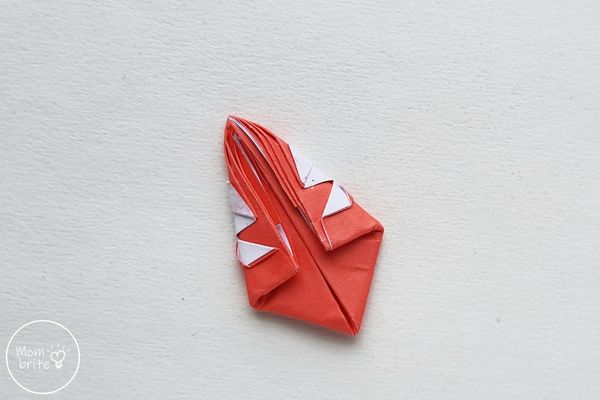
20. Flip the paper to the other side. Use a Sharpie to draw the face of the origami Santa Clause.
Your kids can also make a festive scarf or use pom poms to decorate the origami Santa’s hat.
Final Thoughts on the Origami Santa Craft
Santa is a big part of the Christmas holiday, and your kids will love making their own origami Santa paper craft. You can give the finished origami Santa Claus to friends and family as a Christmas gift, use it to decorate the house, or even hang it on the Christmas tree as an ornament!
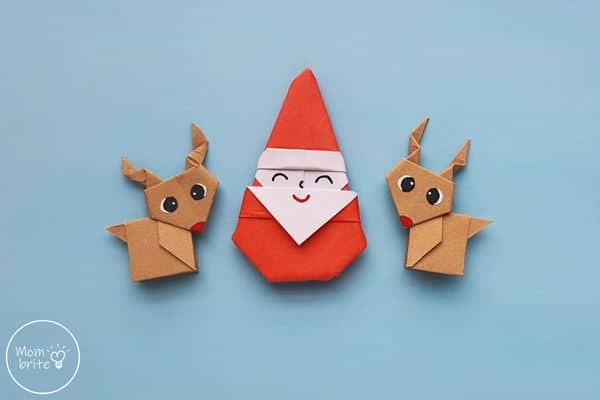
If you haven’t yet, head over to the origami reindeer tutorial and create cute reindeer to help your Santa deliver presents this holiday season!
YOU MAY LIKE:
