KiwiCo is a monthly subscription service full of fun STEM projects for kids. Here is my completely honest review about what we love (and what we don’t like) about the KiwiCo crates.

*** KiwiCo subscription lines are now KiwiCo Clubs! ***
Get ready for an even more exciting adventure with KiwiCo Clubs! Now, it’s not just about receiving a fun project every month—you’ll be getting crates that are part of an epic learning series designed to help your kids grow their skills and knowledge with each activity.
These projects are built to last, so the fun never stops!
Pick your KiwiCo Club and buckle up for a journey through everything from mind-blowing science to world-exploring wonders. Each box is packed with hands-on challenges that’ll spark their curiosity and creativity.
As they tackle more projects, they’ll sharpen their problem-solving skills, explore the world of innovation, and gain the confidence to turn their big ideas into reality!
What’s the Difference Between KiwiCo Clubs and KiwiCo Crates?
KiwiCo Sprout
KiwiCo Sprout is the former Koala Crate, designed for ages 3-4. Preschoolers will create high-quality projects and receive ready-to-play toys they can enjoy over and over, all the while exploring early art and science concepts.
KiwiCo Labs
KiwiCo Labs (Ages 6-16+) is for all science and engineering crates. If you subscribed to the Kiwi Crate, Tinker Crate, and Eureka Crate before, you’ll find brand new rebuildable STEM projects and engaging digital content under KiwiCo Labs.
KiwiCo Studio
The KiwiCo Studio Club is the new Doodle Crate and Maker Crate for kids ages 9-18+. Each crate comes packed with everything you need to craft stunning art pieces, including detailed instructions, bonus inspiration, and digital content to help budding artists master new techniques over time.
KiwiCo World
KiwiCo World is your ticket to an exciting global adventure. Perfect for ages 6-12+, each monthly crate is packed with everything you need to travel the world, dive into cultural history, and build STEAM projects. Get ready to embark on a new adventure every month and explore the wonders of the world – no passport required!
Panda Crate
The Panda Crate will remain the same as before, with brain-building toys for kids ages 0-3+, delivered every 2 months.
Below, you’ll find detailed reviews of all the former KiwiCo subscription lines to give you an idea of what the new KiwiCo Club is all about! Note that the Yummy Crate is no longer offered.
If you ever looked into the best subscription boxes for kids, you probably come across KiwiCo and its products numerous times. What’s in the crate? Does it live up to the hype?
As a homeschool mom, the KiwiCo crates have been an integral part of our science curriculum. With cool projects, experiments, and products designed to expose kids to STEAM concepts (science, technology, engineering, art, and math), KiwiCo has made learning so much fun for my kids.
I also appreciate that the KiwiCo crates come with the tools, materials, and inspiration to explore that month’s project. Without such an easy open-and-go box, I doubt we would be spending as much time learning about science and engineering.
Below, you’ll find details about the KiwiCo product lines and a guide to decide which box is right for your child. Also, you’ll find pictures of us unboxing one of the monthly Kiwi Crates we received and decide for yourself if it’s worth the investment.
We also tried out the Yummy Crate and one of KiwiCo’s kits you can find in their online store. Scroll down to learn more about the different crates and grab the special discount for being a Mombrite reader!
Table of Contents
How Does KiwiCo Crate Work?
KiwiCo crates are designed to help children learn, be creative, and have fun all at the same time!
Each crate comes with different projects that are meant to develop a variety of skills in kids. The crates are designed for children of different ages, so you can find the perfect one for your child.
The crates can be ordered online and then shipped directly to your door. Depending on the line you picked, you may receive a crate every month or every other month.
KiwiCo offers flexible subscription options and pricing starts as low as $17.50/month. For one-off purchases, KiwiCo also offers a variety of individual crates for a wide range of ages, price points, and interests at the KiwiCo Store.
Panda Crate
Age range: 0-24 months
Designed for babies and toddlers, the Panda Crate is delivered to your door every 2 months.
The activities in each crate will help babies develop through playing, exploring, and interacting with their beloved parents and caregivers.
The Panda Crate contains stage-specific quality products made just for your little one’s developmental stage:
- 0-2 months: Bond with Me
- 3-6 months: Sense with Me
- 7-12 months: Explore with Me
- 13-18 months: Count with Me
- 19-24 months: Solve with Me
Examples of Panda Crate toys include:
- Tummy time mirror
- Crinkle tag toy
- Coin box puzzle
- Stacking cups
- Peg puzzle
Koala Crate
Age range: 2-4 years old
Koala Crate is made to inspire creativity and curiosity for preschoolers. The themed activities promote bonding as parents and kids can build, explore, and create together.
Examples of Koala Crate projects include:
- Use a fishing pole to catch felt sea creatures.
- Use a stethoscope to check your patients’ vitals.
- Design and dye a rainbow tote bag.
- Build a fire with paper flames for your camping trip.
My Review of the Koala Crate
Looking for fun and creative projects to do with your preschooler? KiwiCo’s Koala Crate fosters your kid’s curiosity and introduces them to a variety of engaging activities that will help your kids discover the world around them.
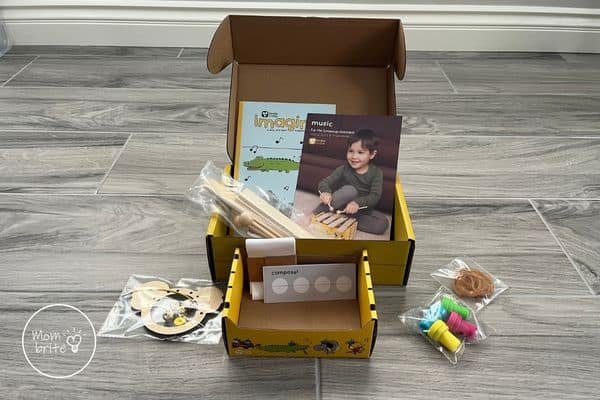
This Koala Crate included three project-based activities that would help little ones explore music in innovative ways. Activities focus on learning how to play instruments, listening to soundscapes, and creating their own unique music projects.
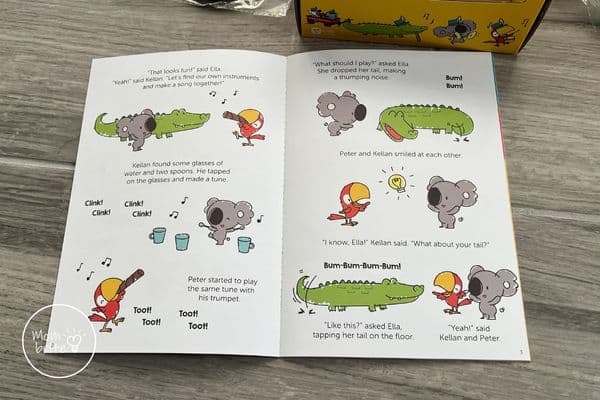
The “imagine!” magazine had an adorable story about 3 animal friends finding creative ways to make music together. You could use different things around you, like cups, or you could even use your own body, like how the crocodile used its tail to thump on the ground.
We also used this opportunity to introduce the literary term, onomatopoeia. The story had several words that were formed by how they sound, such as clink, bum, and toot!
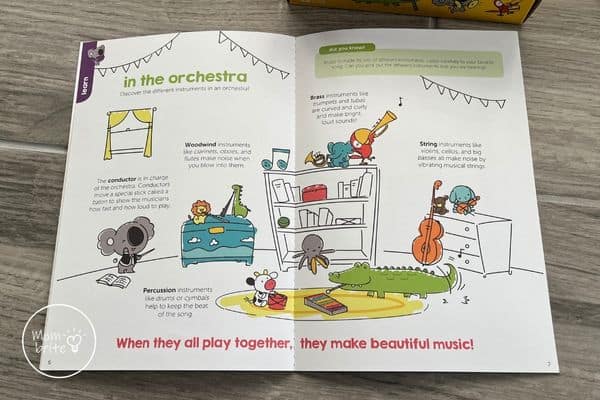
The magazine also had a section on the different sections of an orchestra. It gave a brief description of the conductor, as well as percussion, woodwind, brass, and string instruments. We talked about how every instrument could produce beautiful music by itself, and they could also work together in an orchestra or band to create different melodies and harmonies.
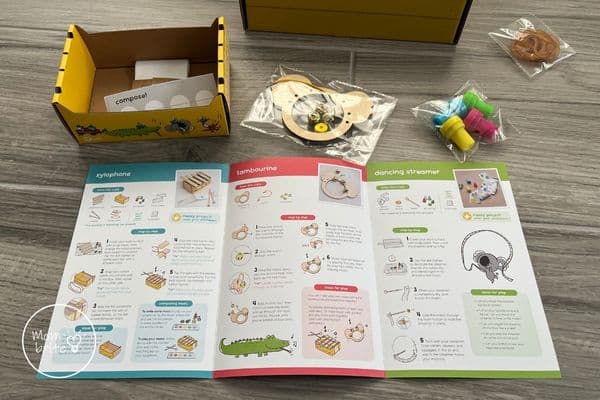
The instruction booklet contained detailed directions for each instrument. The projects were not too complicated so preschoolers could do most of the construction with minimal help.
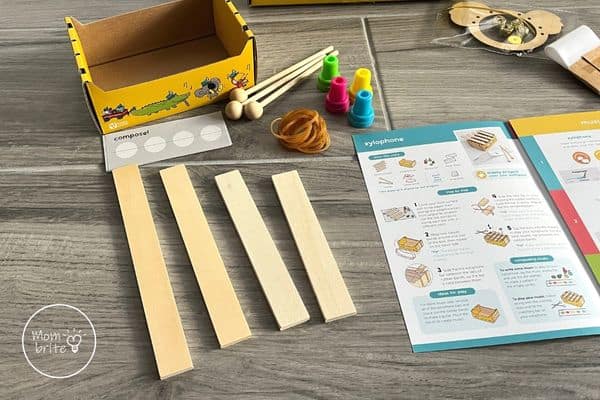
With the xylophone, you first needed to arrange the wooden boards from largest to smallest. This was a great way to teach your preschooler how to differentiate items by size and compare one or more objects.
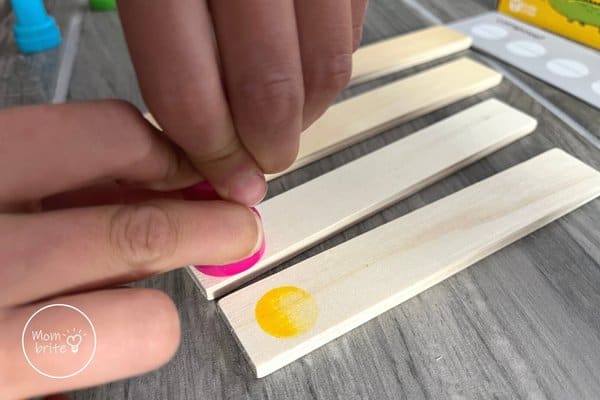
Next, we used the dot stamps to stamp each bar with a different color. Then we wrapped the rubber bands around the box and slid the xylophone bars between the sets of rubber bands. It might be confusing to a preschooler how to cross the rubber bands so that they hold the bars securely, so you might need to step in and help during this step.
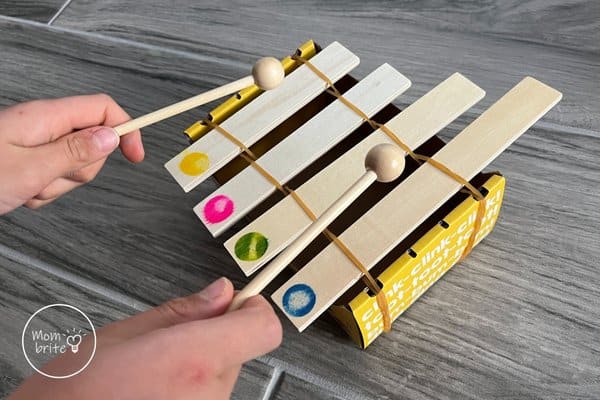
The xylophone was finished! Allow your kid to tap the bars with the mallets and hear the different pitches made by the different bars. Ask your kid whether the longest bar sound lower or higher than the shortest bar. What a great way to train their ears!
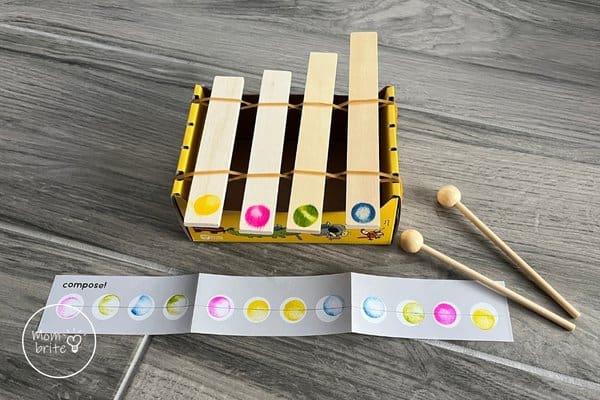
The crate also came with music sheets that your kids can stamp and make up their own melodies! Simply use the dot stamps to make a pattern in the empty circles, then follow along with the colored dots and hit the matching bar on the xylophone!
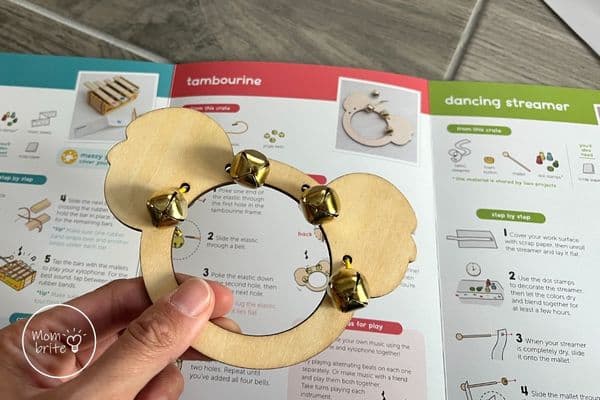
The next project in the Koala Crate was the tambourine, which really worked on your preschooler’s fine motor skills. You had to thread the elastic through the holes in the tambourine frame, as well as slide the elastic through the bells. The tambourine worked really well and my kids had a lot of fun shaking it to make music.
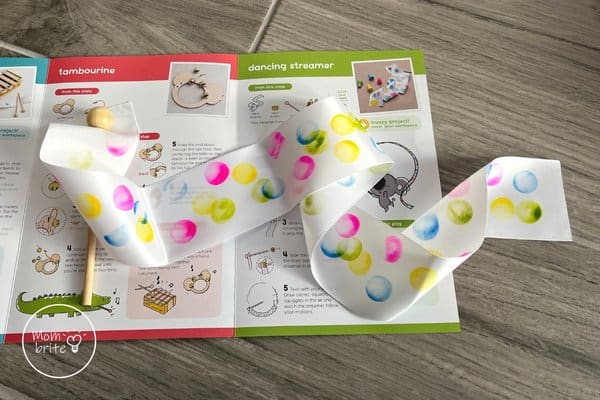
Lastly, we made a dancing streamer with the fabric streamer and mallet that came in the Koala Crate. The kids decorated the streamer with dot stamps, and they had a lot of fun trying to blend two different colors together.
The dancing streamer was my daughter’s dream come true because she always wanted to do rhythmic gymnastics. So while my son played the xylophone and the tambourine, she would dance and twirl the streamer in circles.
Kiwi Crate
Age range: 5-8 years old
Creative projects paired with a fun illustrated instruction booklet, the Kiwi Crate contains innovative activities that kindergarteners and early elementary school kids can do independently or with very little help.
Examples of Kiwi Crate projects include:
- Create an arcade claw game with pom pom prizes.
- Construct a stomp rocket that flies.
- Build a balancing tree game.
- Color paper flowers with capillary action.
My Review of the Kiwi Crate
With any Kiwi Crate, we always start with the Explore! Magazine before constructing the project. My kids love reading through the comics about Steve the Kiwi and his friends. The mini graphic novel is hilarious and introduces the scientific concept behind the project in a way that kindergartens and elementary school kids can understand.
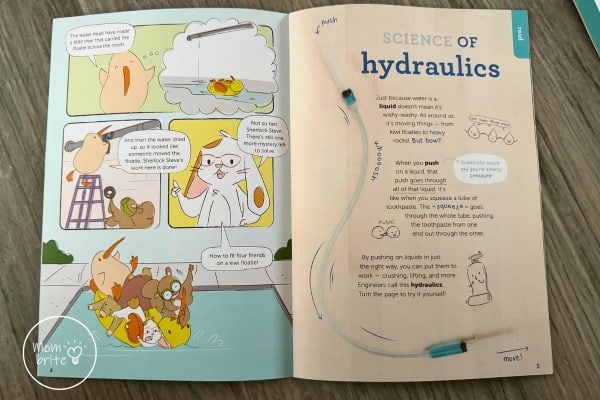
The first step to building the water-powered worm is constructing a pair of hydraulic systems. The instruction manual took the kids step by step through how the system works, and my daughter studied how squeezing the syringe pushed the water through the tube to the other syringe.

My daughter then proceeded to construct the water-powered worm. She followed the instruction manual and finished constructing the project with little assistance from me. Since she is a beginner reader, the detailed illustrations helped her understand the orientation of the different pieces.
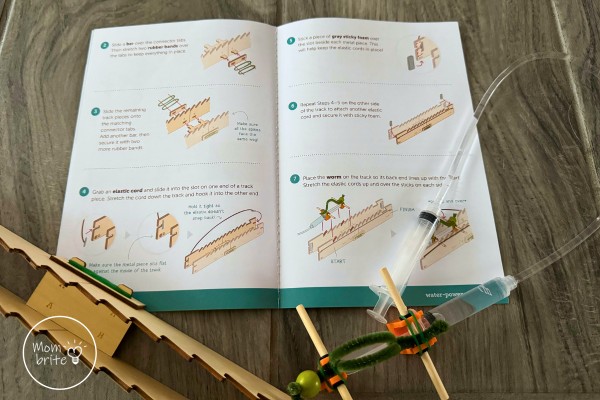
The water-powered worm was so much fun! The worm was connected to the top of a syringe and every time the syringe plunger lengthened or shortened due to the hydraulic systems, the worm would extend and contract just as a real worm would. My daughter tried to move the worm as fast as she could through the “race track” and analyzed why placing the worm in the other direction on the track wouldn’t work.
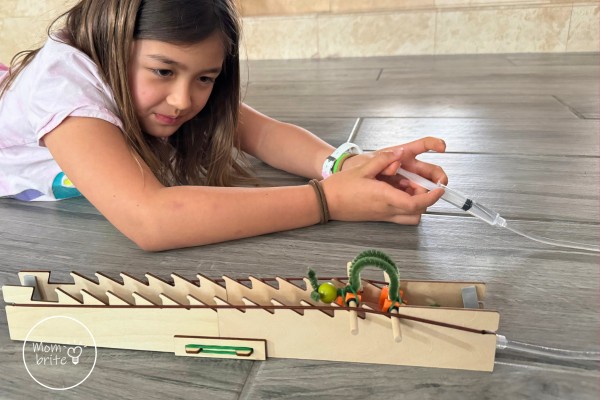
The wonderful thing about the Kiwi Crate is that there are multiple projects in the box to demonstrate one scientific concept. After we were done playing with the wiggly worm, we moved on to the next activity – Mystery Color Machine!
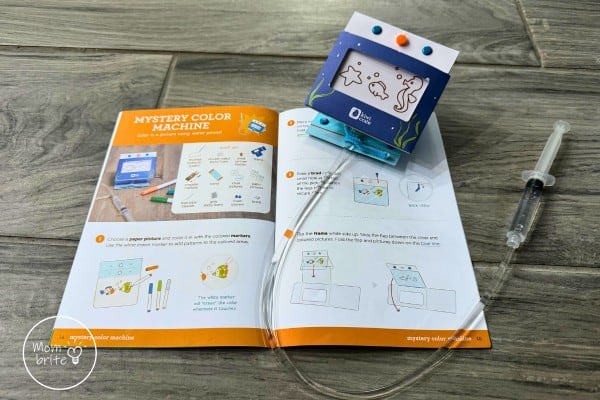
Being a fan of arts and crafts, my daughter was excited that this Kiwi Crate project allowed her to use her creativity to color the sea creatures. Then, using the same hydraulic systems, she moved the picture up and down the frame.
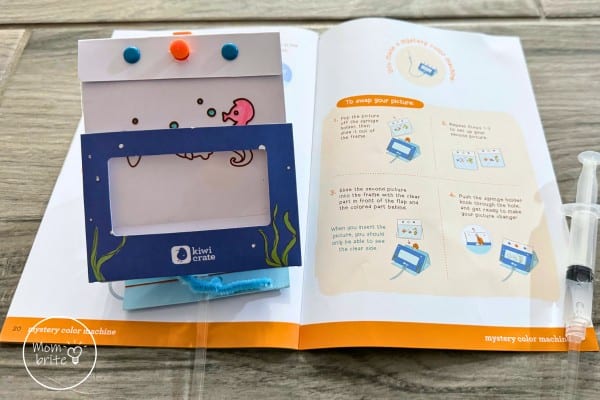
Magically, the sea creatures went from black and white to colored! My daughter took some time to study the design and the engineering behind how the color change happened.
I love how KiwiCo crates amaze my kids with these innovative projects and make learning feel like playtime!
Another Look at the Kiwi Crate
I am sure your kids see you vacuum the house all the time, most of the time probably cleaning up after them. Us moms can’t live without a vacuum, especially if you have little ones who love to snack and leave crumbs everywhere.
But can your kid construct something that can sweep up small objects too? KiwiCo has the answer for you in the Mechanical Sweeper crate from the Kiwi Crate subscription line.
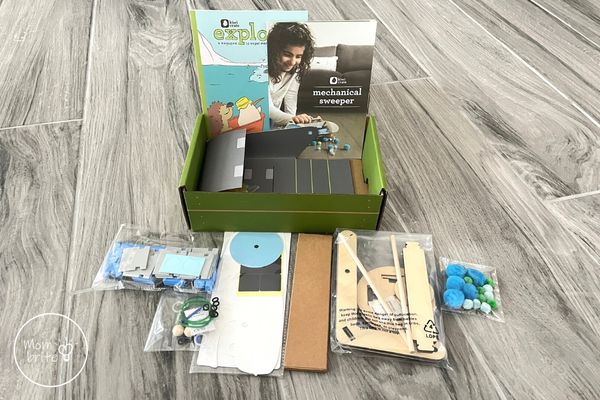
The crate came with everything needed to make a toy mechanical sweeper that can pick up small objects, somewhat similar to what a vacuum cleaner does. My kids always look forward to the Explore! booklet and the fun cartoon explaining how things work.
Since my kids grew up with Kiwi Crates, it’s interesting to see how they progress each time we open a crate. Now that my daughter is 6, she can almost go through all the instructions and build the mechanical sweeper without any assistance. I just needed to help her hold the loose parts in place while she slipped rubber bands on the slots of the sweeper wheel.
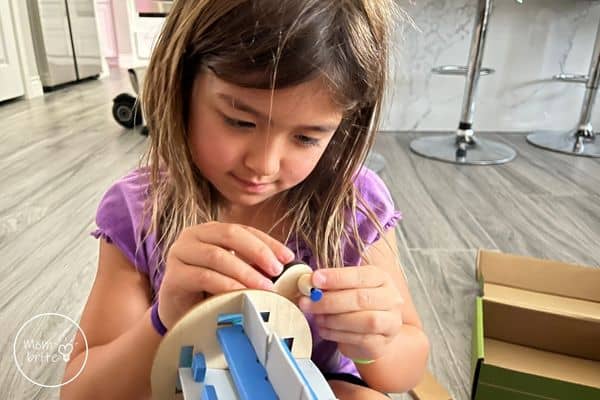
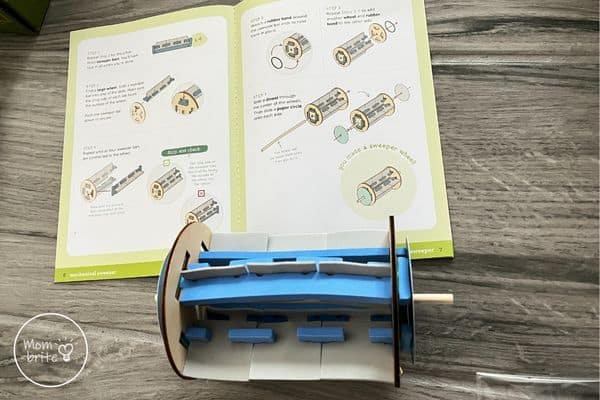
The crate also came with pom-poms for the kids to pick up. My kids loved pushing the mechanical sweeper and watching the multiple moving parts that allowed it to pick up the pom poms.
In addition to the mechanical sweeper, the Kiwi Crate also came with a watercolor painting project. Included in the crate were a watercolor paint set, salt, and a paintbrush. The kids were free to use their imagination to color a whale cutout made out of watercolor paper, which you can use later on to decorate your sweeper.
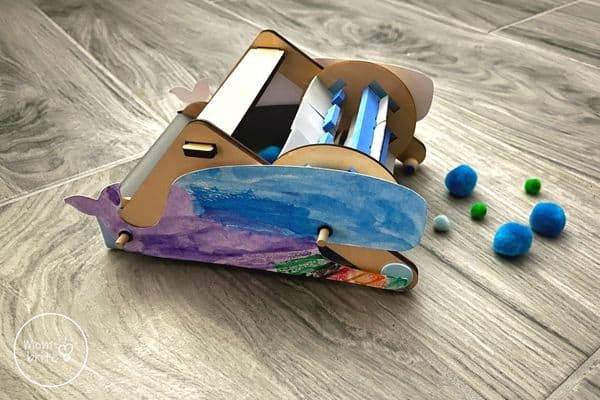
What’s different about the watercolor whale from a simple art was that the kids sprinkled salt on the watercolor paint afterward. This created a very interesting texture for the whale. Also, the area where the salt touched the paper will be lighter in color as the salt pushed the watercolor pigments away.
The booklet also provided interesting facts about whales. Your kids will learn about the biggest animal on the planet (spoiler alert… it’s the baleen whale!) and how the whales sing to communicate. Did you know that there is a humpback whale named Mr. Splashy Pants somewhere in the ocean today?
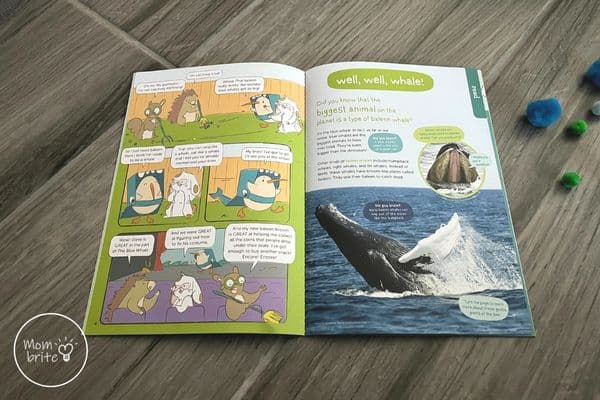
My kids had tons of fun seeing the reaction between salt and water as well as seeing the inner workings of engineering a sweeper. Maybe I can convince them to help me clean the floor with their mechanical sweeper?
Here is a summary of the Kiwi Crate review:
What We Like:
- Multiple projects per box
- Easy-to-read instructions with detailed illustrations
- Fun and cute comic that teaches the kids science concepts
- Upcycle the cardboard box for additional STEM activities
- Innovative design so you don’t feel like you are doing projects you could have done by yourself at home
- The projects are reusable and your kids might like them better than store-bought toys
What We Don’t Like:
- If you are looking for activities for your kids that they can do 100% independently, the Kiwi Crate is not for you.
- The quality of the products, though not bad, could be slightly better
Atlas Crate
Age range: 6-11 years old
Atlas Crate is made to help your child explore the world and the different cultures. Beginning with the World Crate, where your child will build a real spinning globe, each crate takes a deep dive into a country and immerses your kid in the country’s customs, history, and foods.
Examples of Atlas Crate projects include:
- Craft a koinobori fluttering carp windsock from Japan.
- Create your own Nazca Line art from Peru.
- Make a hanging three-toed sloth from Brazil.
- Paint hojalata tin art from Mexico.
My Review of the Atlas Crate
You can pick up a book, you can watch a YouTube video, or you can even dine at an ethnic restaurant. But how do you really experience another culture without spending tons of money traveling there? Atlas Crate delivers just what you need to teach your kids about different countries with fun activities.
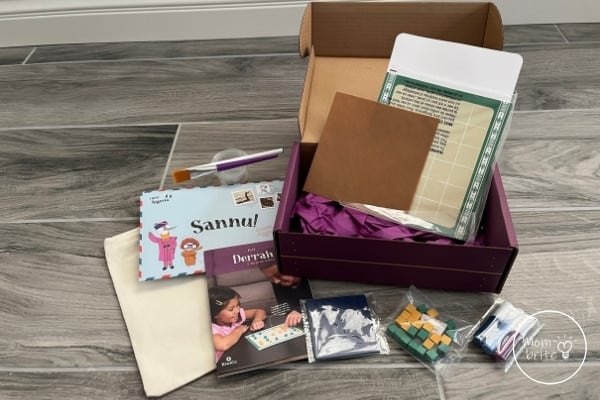
For our Atlas Crate, we joined our travel buddies Anya and Milo and discovered Nigeria. The box came with Atlas cards that you can bind together to form your own travel book.
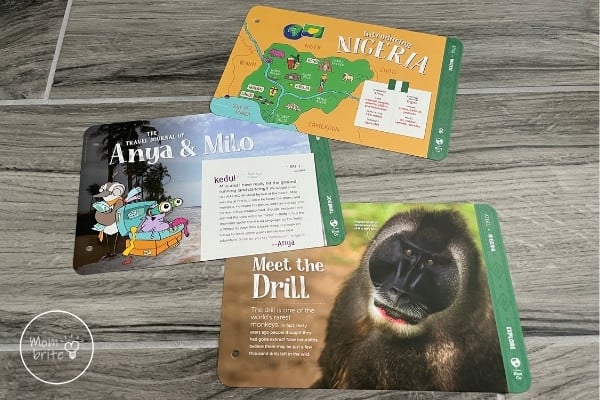
The pages include fascinating facts and photos about Nigeria, including exotic animals, Shuku Shuku recipe, and directions on how to play the okwe game.
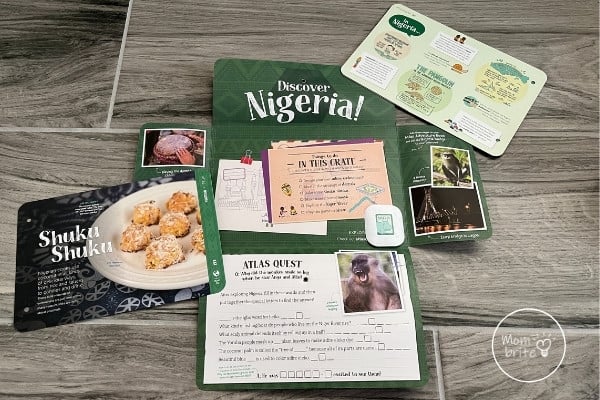
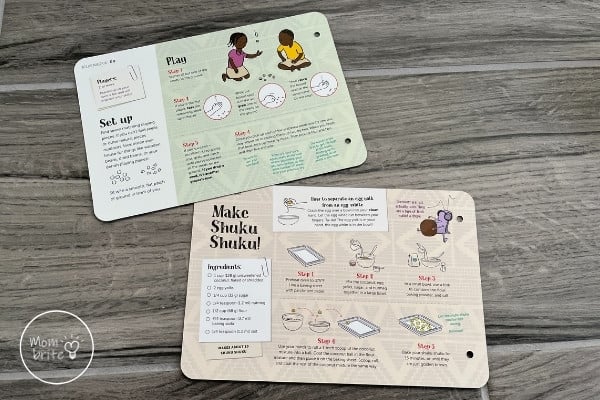
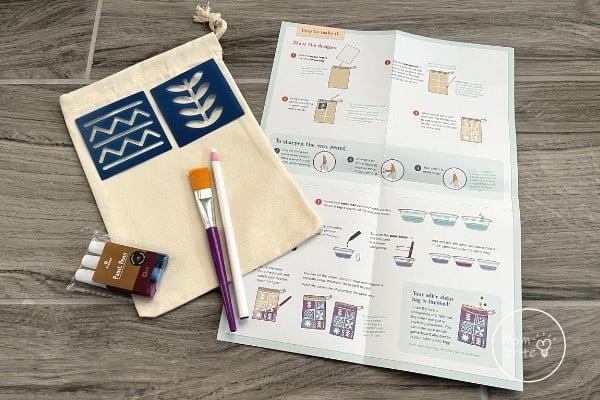
The Atlas Crate included materials for making an adire eleko bag. First, you use a wax pencil to draw your own design or trace the stencils on the bag to create a unique design. Then you use the paint provided to color the pouch. The wax will resist the color and the white designs will come through.
What a beautiful bag and a wonderful project to learn about the traditional Nigerian dyeing and printing technique.
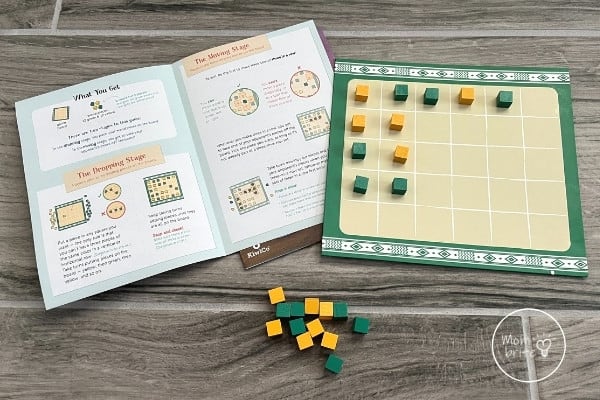
The box also came with the game board and wooden pieces for the derrah game. The goal of the game was to form three sets of three-in-a-rows before your opponent. It might resemble tic-tac-toe, but the gameplay was far more complex. At the same time, the directions were clear and my children were able to follow the rules and play the game.
As you can see, the Atlas Crate provides you with a set of activities that you can do with your kids to teach them about another country. Through the games, crafts, and recipes, your kid can experience what it’s like to be a kid in a different culture. I highly recommend it for kids to learn about and appreciate other world cultures.
Yummy Crate
Age range: 6-14 years old
Learning STEM has never been more delicious! Not only does the Yummy Crate include food science experiments, but it also fosters a love of cooking with family-friendly recipes and activities.
Examples of Yummy Crate projects include:
- Explore Maillard reaction with smashed potatoes.
- Learn about the history of hamburgers and then make some for the family.
- Make light and fluffy pancakes for breakfast.
- Conduct fizzy kitchen experiments using baking soda.
- Dive into phytonutrients with fruity rainbow smoothies and savory salmon skewers.
My Review of the Yummy Crate
I recently tried a Yummy Crate and I have to say that I was very impressed! The crate was filled with recipe cards, STEAM activities, the Yummy Zine magazine, and adorable little kitchen tools. My kids couldn’t wait to get started with the hands-on experiments!
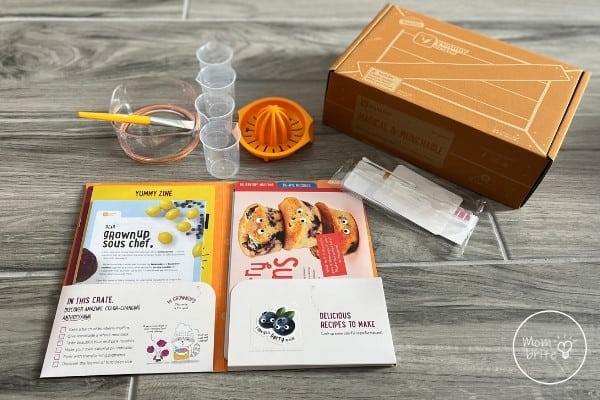
The Yummy Crate we received was all about anthocyanin, which my kids knew very little about prior to this crate. Anthocyanins are a type of pigment found in plants, and we focused on the anthocyanin found in red cabbage for most of the experiments.

The first thing we opened was the Yummy Zine magazine. It gives a detailed explanation of what anthocyanins are and provides a solid background for the experiments in the crate.

The first experiment we tackled was the color-pop bookmarks. Unlike the Kiwi Crate above, which contained everything you needed for the activities, the Yummy Crate does require you to gather food ingredients outside of the materials included in the box.
Before we could do any of the experiments, we had to prepare red cabbage juice. While the process wasn’t difficult (all you need to do is blend the red cabbage with water and strain), it did make the experiment longer than I expected. So make sure you read and prepare ahead of time to ensure that you have enough time for the experiment.
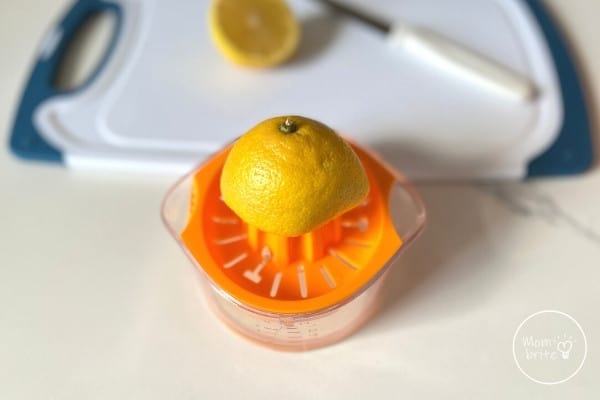
For the color-pop bookmarks, we also had to prepare a baking soda and water solution plus lemon juice. My kids loved using the included mini citrus juicer to juice the lemon. Later on, they used it to make their own orange juice as a quick afternoon snack!
The Yummy Crate included paper bookmarks, a paintbrush, and little beakers for the liquids. I placed all the materials on a baking tray to prevent any spillage.
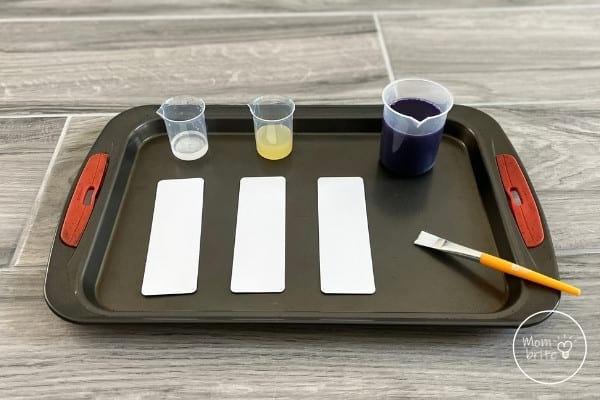
To make the color-pop bookmarks, you had to apply two layers of red cabbage juice using the paintbrush. We followed the illustrated instructions carefully and read that you needed to paint both sides of the bookmark to ensure that the paper doesn’t curl up.

The bookmarks needed about 10-20 minutes to dry out before we could start applying the other liquids on them. The wait felt like forever with two young kids who were way too excited about the experiment. I recommend doing another experiment or cooking a recipe during the wait to help pass the time.
Finally, the bookmarks were dry and the painting could begin! Using Q-tips, my kids drew on the bookmarks with lemon juice and baking soda solution. To their delight, the bookmarks changed colors wherever they applied lemon juice and baking soda solution.
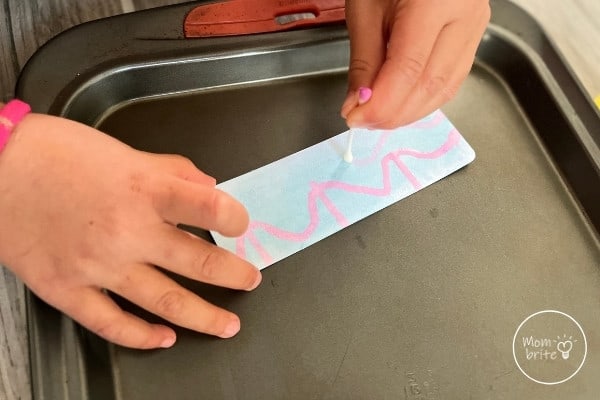
We learned that red cabbage juice is a pH indicator. I showed my kids how to use the pH color scale that was included in the Yummy Crate to determine if a mixture was acidic or basic.
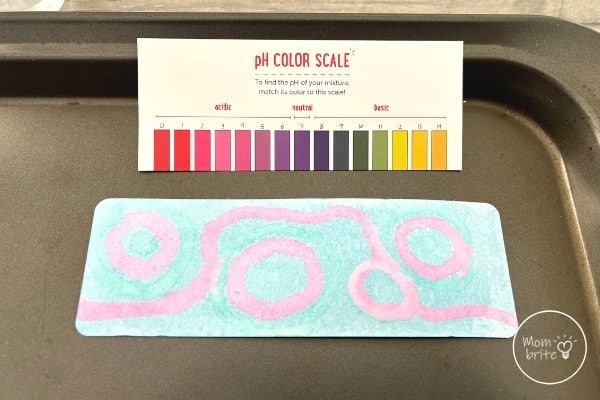
The experiment was a success! The kids absolutely loved coloring the bookmarks with lemon juice and baking soda. I wish the Yummy Crate included a few more paper bookmarks for them to color more!
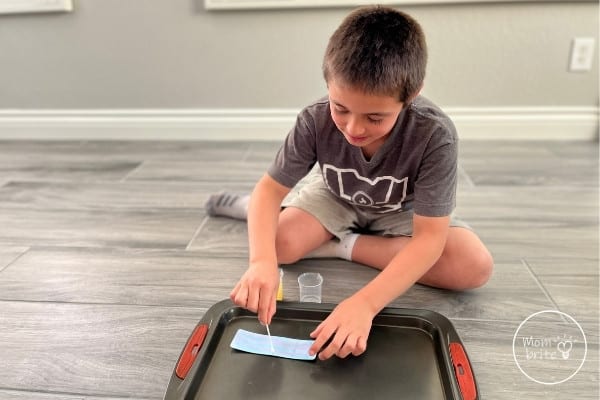
Look how pretty and unique these bookmarks were! They came with plastic sleeves to help protect them from damage. After this experiment, we couldn’t wait to try the cabbage chemistry experiment next!
Doodle Crate
Age range: 9-16 years old
If you have a crafty and creative kid at home, Doodle Crate has the perfect projects to explore fun crafting tools and interesting techniques.
Examples of Doodle Crate projects include:
- Create a cute felt succulent garden.
- Design a faux leather portfolio so you can sketch anywhere you go.
- Make custom soaps with beautiful designs.
- Learn candle molding and make intricate candles.
My Review of the Doodle Crate
With tons of craft paper, googly eyes, stickers, pipe cleaners, and other craft supplies lying around the house, I have resisted getting the Doodle Crate. I am so glad that KiwiCo sent me a box to try because the project was so fun and something I would have never thought to try with my kids.
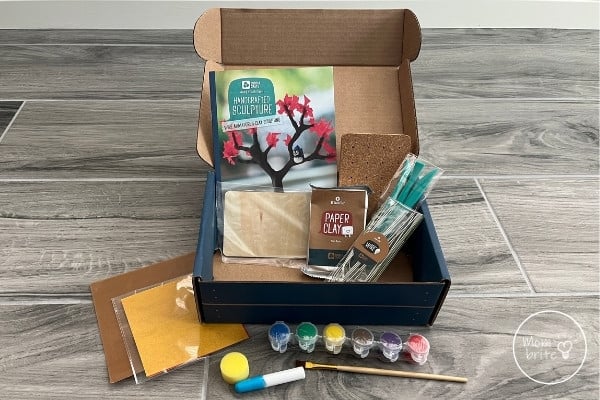
In our Doodle Crate, we have all the materials needed to make our own handcrafted sculpture. I was so excited when I saw the paper clay. I have fond memories of taking sculpting classes and using paper clay to make intricate bowls, jewelry, and even dolls.
The instructions are very clear, but they also give lots of room for creativity. Instead of taking you step-by-step through how to make one particular sculpture, the instructions laid out the basics and let you decide what the end product is.
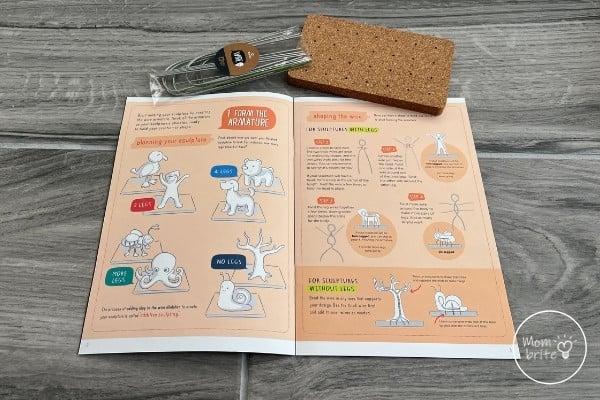
For example, the booklet described and illustrated how to shape the wire for sculptures with legs. You can choose to do a sculpture with 2 legs, 4 legs, or even 6 legs. There are also directions on how to make sculptures without legs. This means you can create virtually any animal or insect you would like with the wires and paper clay.
My daughter decided she wanted to make a person. The wires were pretty easy to shape, and the Doodle Crate gave you extras in case you mess up or want to construct another sculpture.

Next, we started to stick the paper clay onto the wires. My daughter had a lot of fun adding the paper clay little by little, but she needed some help using water to smooth out the clay. She is younger than the recommended age of 9-16 so I expected that she would require some help to complete the sculpture.
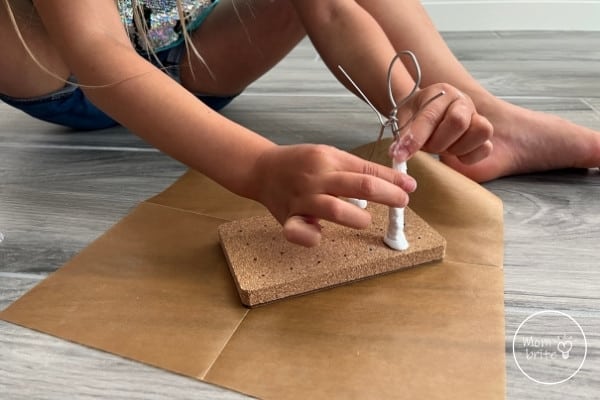
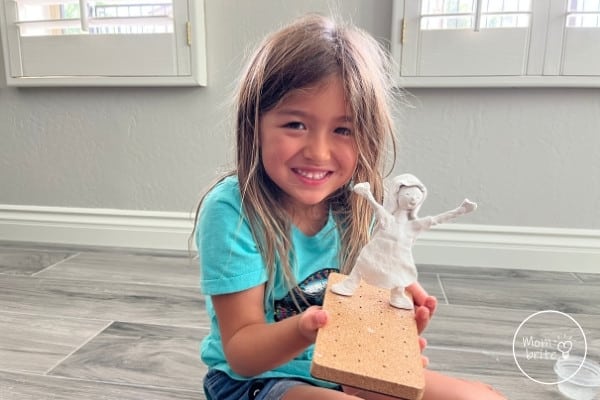
After we finished molding the paper clay, we used the tools provided to add details to our sculpture. By dipping the tips of the tools in water, she was able to make designs in the dress. We also added some details to the long hair so that it looked more realistic.
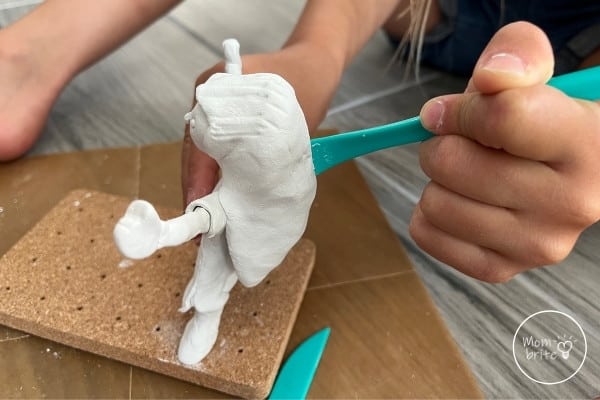
The paper clay did take longer to dry than expected. We did have to leave it overnight until the clay dried completely and we could paint it. I love how the instruction booklet included a color mixing chart to teach the kids how to make new colors from the ones they have.
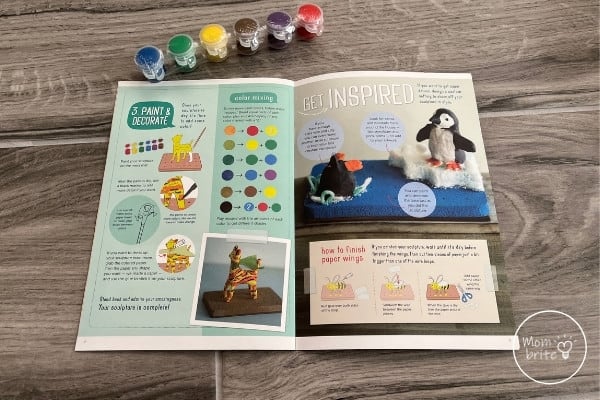
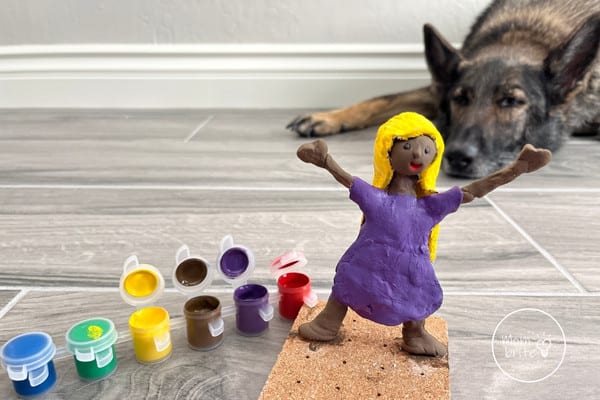
Painting the sculpture was difficult but so much fun! As we worked on the sculpture together, my daughter and I realized that we should have gone from lighter color to darker color. This way, if you messed up and accidentally painted parts of the sculpture a different color, you can easily cover it up with the darker paint.
Not bad for our first sculpture!
Tinker Crate
Age range: 9-14 years old
The Tinker Crate aims to inspire kids to use their problem-solving and critical thinking skills to tackle challenges where there is no one right answer. With awesome hands-on projects that are designed by experts and tested by kids, the Tinker Crate is an excellent resource to help kids gain crucial skills while having fun.
Examples of Tinker Crate projects include:
- Build a wooden automaton that makes a marble climb up the stairs.
- Wire up an electric-powered droid that eats coins.
- Construct an electric-powered motorcycle.
My Review of the Tinker Crate
The Tinker Crate is the older kid version of the Kiwi Crate, and it has become my children’s favorite subscription line from KiwiCo. The projects are more complicated and take more patience to make, but the machines are so fun to play with once you are done!
Inside our Tinker Crate was everything we needed to build a domino machine. How exciting! Do you know how many times my kids and I tried to make a long row of dominos just to have one fall by accident and knock the whole thing down?
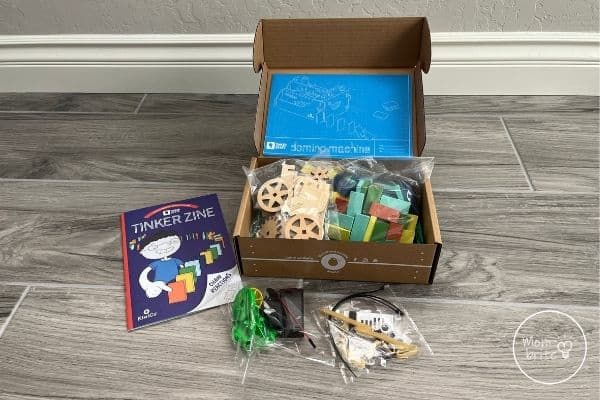
The instructions are very detailed with illustrations for each step. I like how the booklet broke up the directions into sections such as “Start the drivetrain” and “Add the wheels” so you know the purpose of what you are putting together.
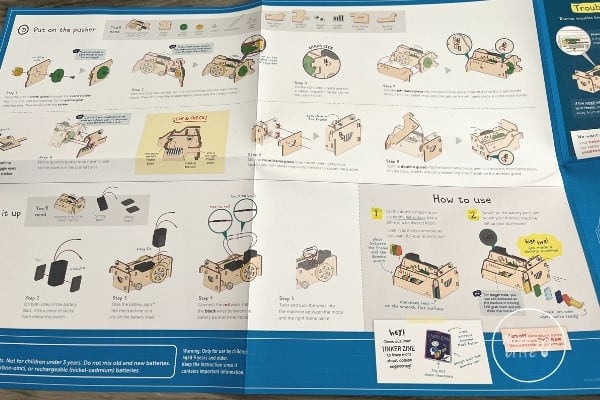
I also really appreciate the “Stop & Check!” steps highlighted in yellow. Sometimes you assemble a part upside down or missed a step, and it’s great to have a checkpoint instead of waiting until the end of the instructions to find out that your machine doesn’t work. These checkpoints saved us on a couple of occasions for the domino machine.
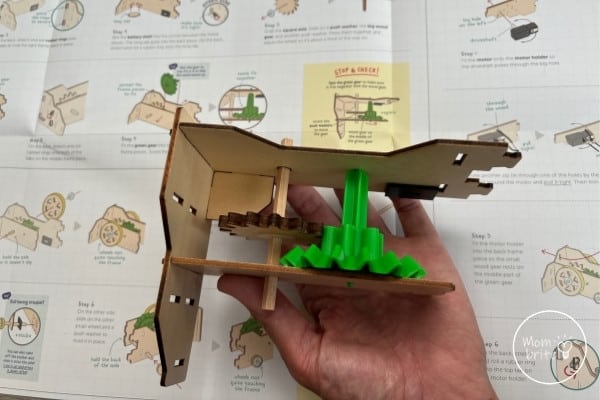
My kids were thrilled to find the motor and battery pack in the supplies. In the Kiwi Crate, we dealt more with mechanical contraptions that you move manually. Now with the Tinker Crate, we get to explore machines powered by electricity.
Look how cute it is!
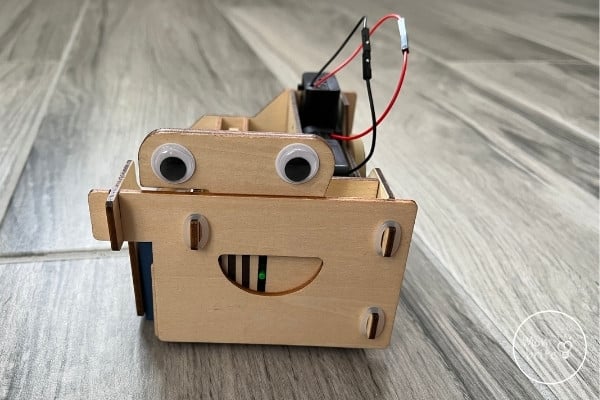
The domino machine worked so well! You load the machine with a stack of dominos and turn on the battery pack. The machine then pushed out the domino one at a time while moving backward. Once in a while, a domino would fail to line up correctly and the machine would push it out crooked, but we never had one that fell and knocked over the entire line.
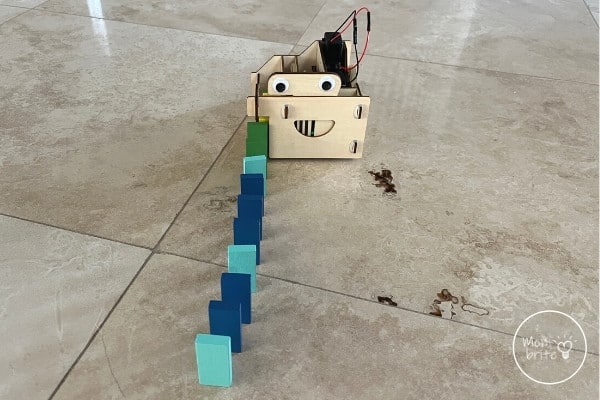
The kids spent the next few hours playing with the domino machine. They tried lining up all the dominos that came in the Tinker Crate. They tried using the machine for straight lines and then manually placed dominos to make the design curve. We also discussed how the speed of the machine was critical in determining how apart the dominos were from each other.
The Tinker Crate also came with a booklet explaining the science behind the project – in this case, reaction attraction.
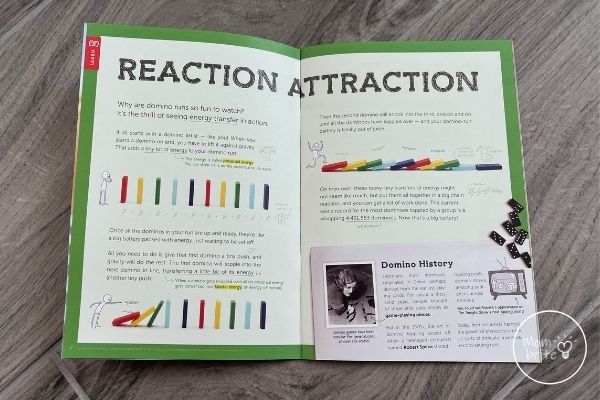
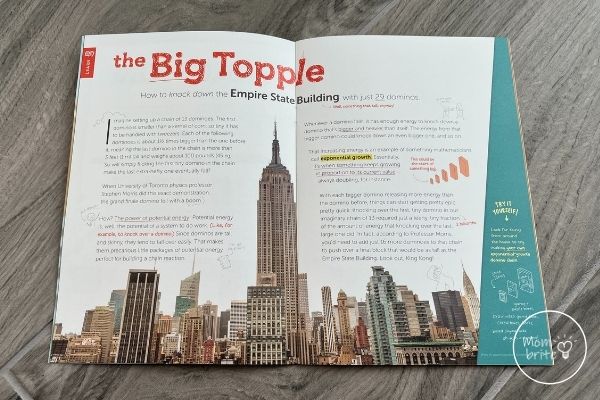
Then the booklet expanded beyond the basics and shocked us with the power of potential energy. Who knew that you can knock down a skyscraper with just 29 dominos?
Lastly, the booklet also contained a challenge for your kids to try. Instead of just lining up the dominos on the floor in one straight line, the challenge asked us to use dominos to complete a simple task. Imagine if you could make popcorn or ring the doorbell by pushing over one domino!
Maker Crate
Age range: 14-100 years old
Whether you are 14 or 48, you can discover new art and design techniques that you can use for a lifetime. I have a mom friend who gets the Maker Crate for herself every month and she loves all the projects that she gets to create while her kids play with the Kiwi Crate.
Examples of Maker Crate projects include:
- Make a pair of macrame hangers and clay pots for your plants.
- Learn to create textured designs with loops of yarn and make a cozy, colorful pillow.
- Create a terrazzo tray and a set of handcrafted containers.
My Review of the Maker Crate
Designed with teens and adults in mind, the Maker Crate takes art and design to the next level. With high-quality materials and tools, the Maker Crate will inspire you to create amazing projects and explore new techniques.
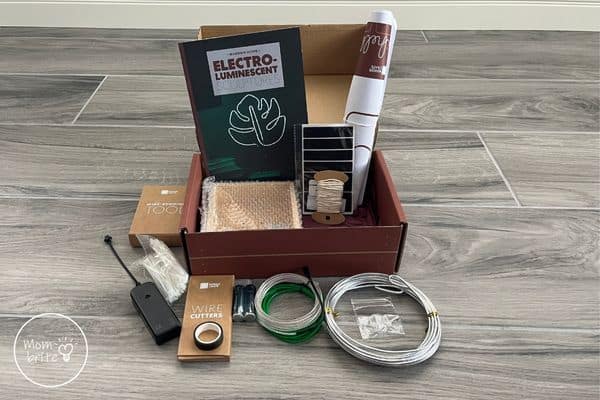
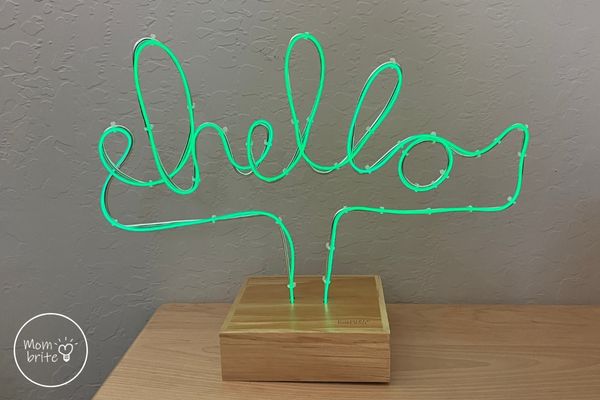
For our Maker Crate, we learned how to make electroluminescent wire sculptures. The box came with all the materials you needed to make the sculpture, and some extra parts in case you wanted to make a second one!
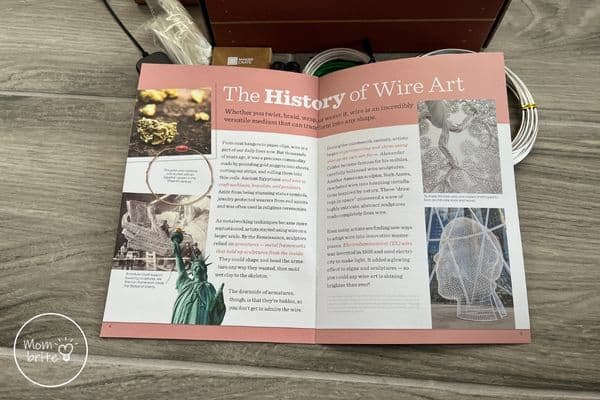
Unlike the other KiwiCo subscription lines for younger kids, the Maker Crate only came with one booklet. My kids and I enjoyed reading about the history of wire art, and my daughter was determined to learn how to make a wire necklace after we finish the wire sculpture.
The reason why there were fewer booklets in the box was that the instructions were actually online! The Maker Crate came with detailed, step-by-step instructional videos that you can follow to complete your projects.
I was impressed that before attempting to make a wire sculpture, the instructions walk you through how to practice bending and twisting the wires into any shape by using the jig tool. If you are a perfectionist like me, you would appreciate the extra practice so that you can make the wire sculpture as similar to the template as you can.
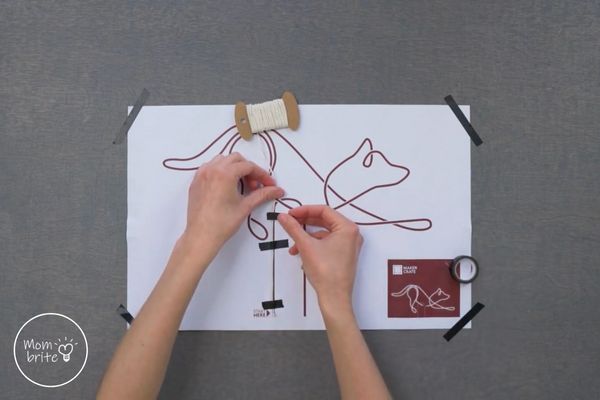
The first step to making an electroluminescent wire sculpture was to determine how long of a wire you need. After selecting a template (there were 8 to choose from), we ran the string along the outline. The string acted as a ruler to measure how long the wire should be. Brilliant!
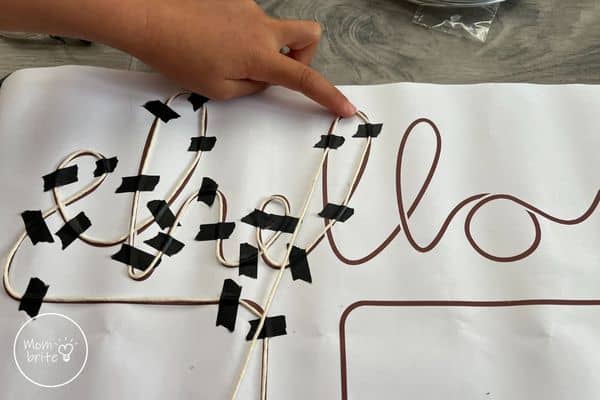
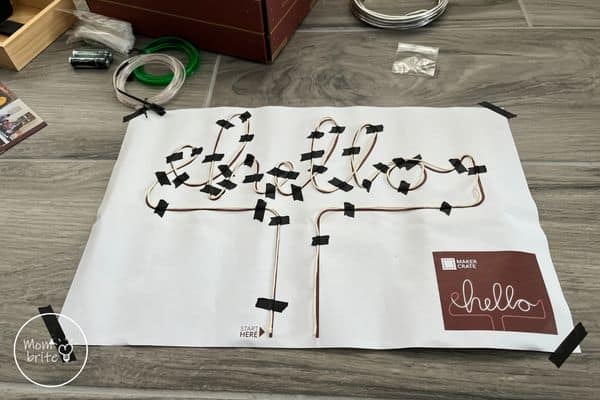
After you measure the wire to its proper length, you simply start bending the wire to match the design. The wire-shaping tool was extremely helpful in making the loops and curves, and the aluminum wire was malleable enough that you could make adjustments as you go.
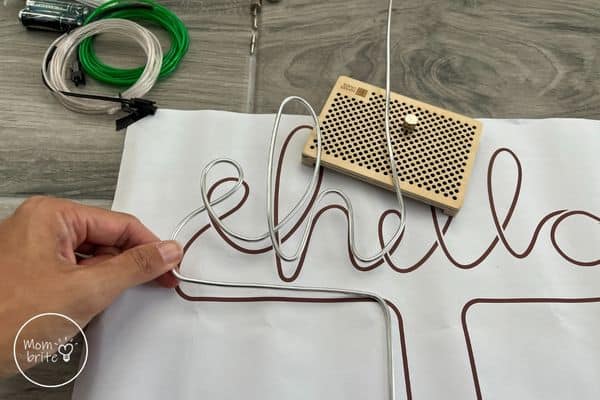
As I continued to shape the wire, my son helped me put together the base and battery pack. The instructions were easy to follow and he put everything together without my assistance.
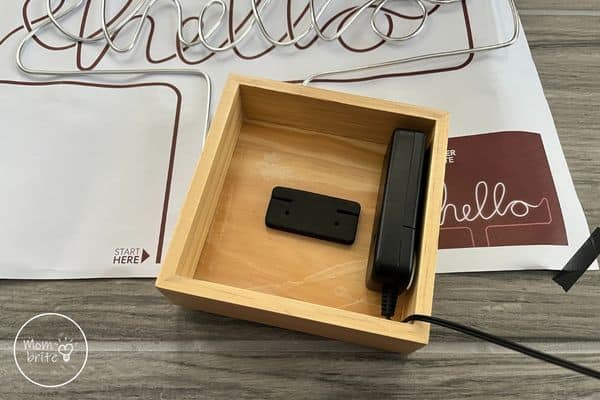
I was able to finish the wire art without too much struggle. Then we attached it to the base with foam tape.
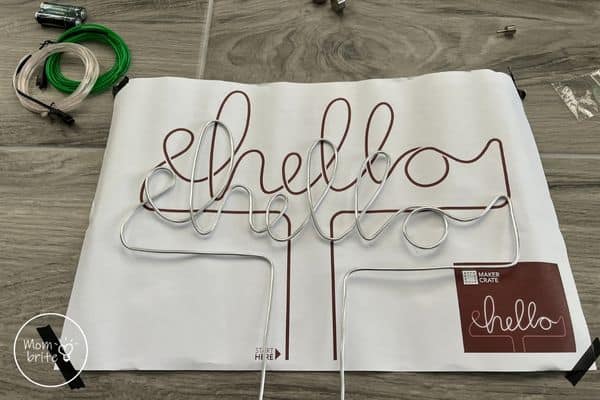
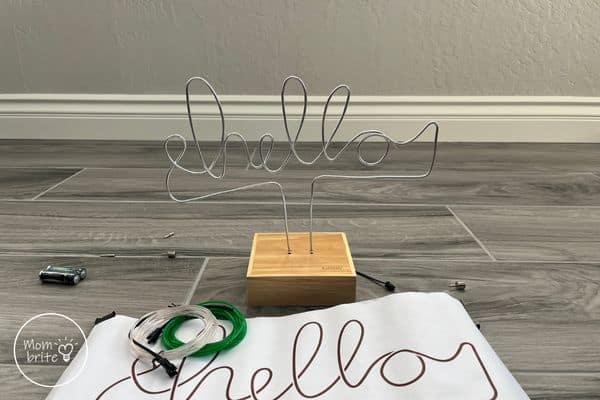
To make the sculpture glow, you need to add the EL (electroluminescent) wire! I helped my kids attach the EL wire to the base but then left them to secure the EL wire to the aluminum wire with zip ties.
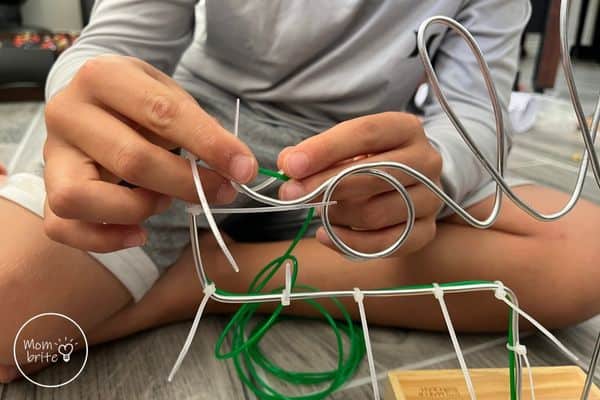
It was a lot easier having one person hold the EL wire while the other zip tie. That said, I was able to zip tie the EL wire to the sculpture by myself after my kids ran out of patience and left me to finish.
After using the wire cutter to trim the excess pieces off the zip ties, it was time to display the wire sculpture. We found a dark spot in the house, pressed the power button, and lit it up!
Eureka Crate
Age range: 12-100 years old
Do you have an inventor in your house? If so, he or she will love the Eureka Crate. Aimed to inspire innovators to think about the design and engineering behind everyday objects, the Eureka Crate will teach your kids how things work so that they can apply creative solutions to real-world problems.
Examples of Eureka Crate projects include:
- Engineer a cantilevered, adjustable lamp that comes with an energy-friendly LED bulb so you can use it to read.
- Build an electromechanical pencil sharpener that automatically detects pencils.
- Make a real four-string concert ukulele and explore the science of sound waves.
My Review of the Eureka Crate
My kids grew up with the Kiwi Crate and had a blast with the Tinker Crate. Now it’s my turn to play with the Eureka Crate!
The Eureka Crate digs deep into how things work. It makes you wonder about how an adjustable lamp moves, how an electric pencil sharpener shaves off the wood, or how string instruments make different sounds.
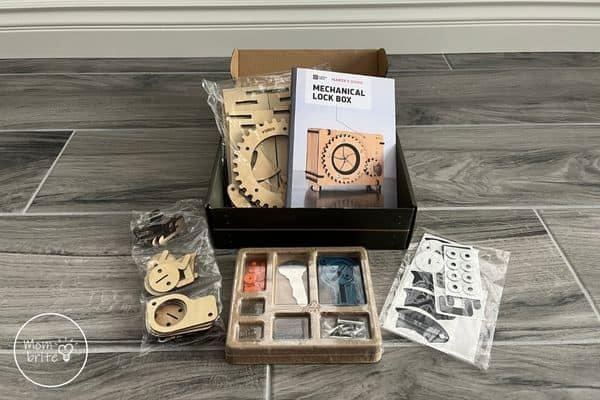
We received the mechanical lock box in our Eureka Crate. As with the other KiwiCo crates, it came with all the materials you need for the project.
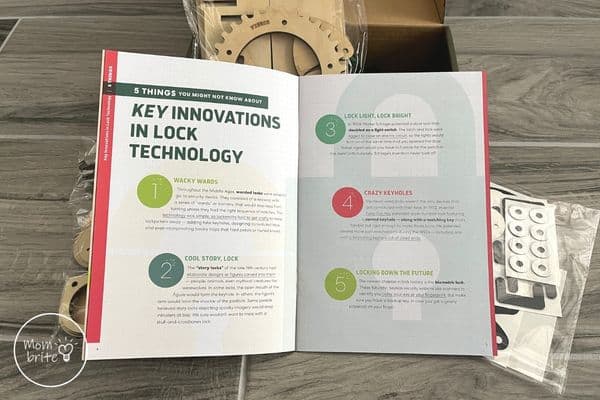
The booklet that came with the box taught us about key innovations in lock technology, which included the history of locks and also the latest technology of biometric locks.
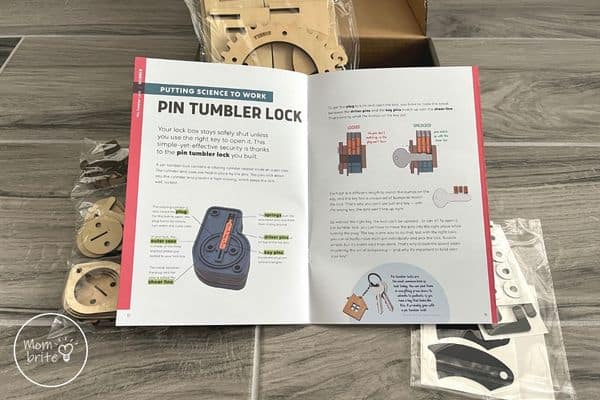
My kids were fascinated by how pin tumbler locks work. We learned the different parts of a pin tumbler lock, and how the bumps on the key needed to match the pins in the lock in order for the lock to turn.
The booklet also had detailed instructions on how to build the mechanical lockbox. We really appreciated how the instructions came with illustrations so we knew exactly which piece to use and how to assemble them.
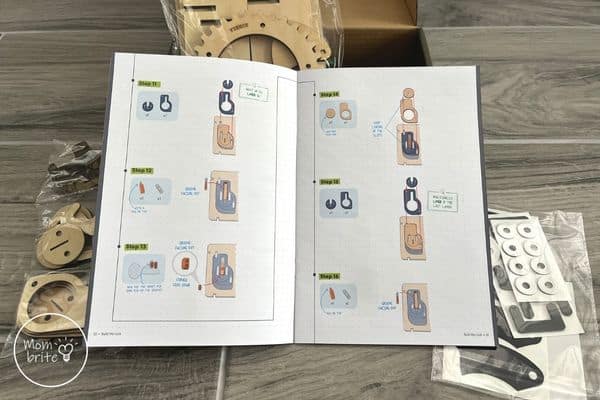
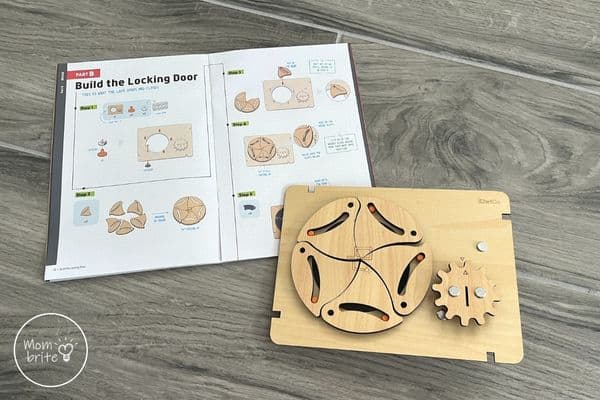
As with the Tinker Crate, the instructions had “Stop and Check” sections where you perform a quick check on whether or not your lock box was working as planned. This was super helpful in ensuring that you don’t make a critical mistake in the assembly that could not be corrected later.
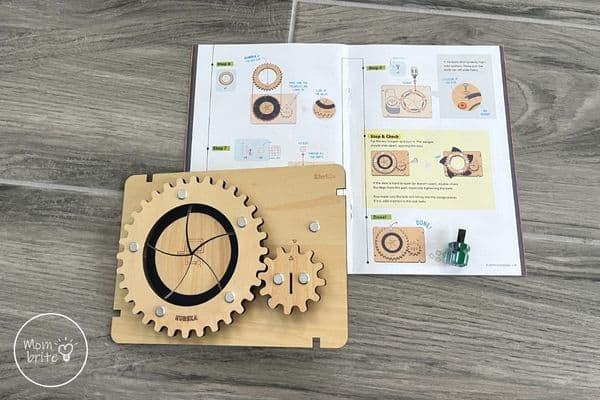
The mechanical lock box was fairly simple to put together. I would say that the difficulty was comparable to the domino machine we constructed with the Tinker Crate, perhaps just with more parts.
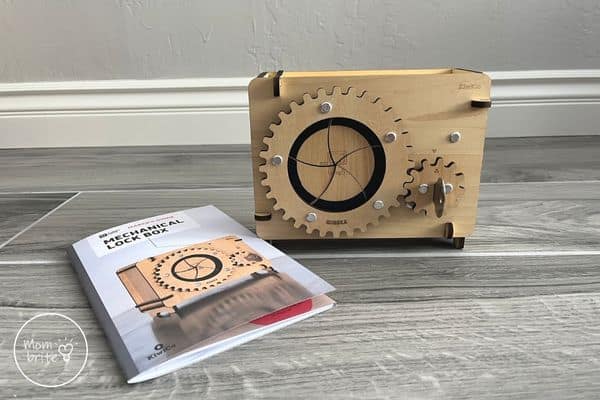
We loved the cool spiral effect when you turn the key. It was also fascinating to see how the key turned the gear, which moved the teeth of the vault door gear and spun it open.
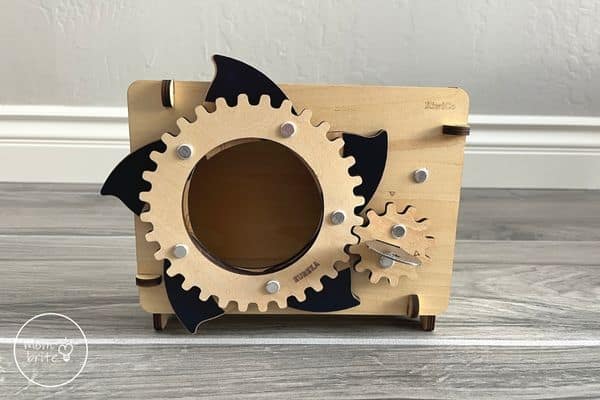
My kids were so excited to use the mechanical lock box for their precious belongings!
KiwiCo Store
Need a birthday gift for a STEM-loving kid? Or perhaps you want to reinforce a concept that you are teaching your kid as part of your homeschool curriculum. The KiwiCo Store has many fun on-off crates you can choose from for kids of all ages.
If you are not sure which kit to get, the KiwiCo Store has a crate matcher-upper to help you decide. All you need to do is select your child’s age range and interest and it will show you all the kits in that category.
Review of the Crystal Ombre Soap Making Kit
I have been wanting to make soap with my kids for a while now so I was super excited to receive this Crystal Ombre Soap Making Kit from KiwiCo!
The kit comes with everything you need to make colorful, crystal-inspired soaps. I have looked at different soap molds before but never pulled the trigger because of the cost, so I was so happy to see the different molds included in this crate.
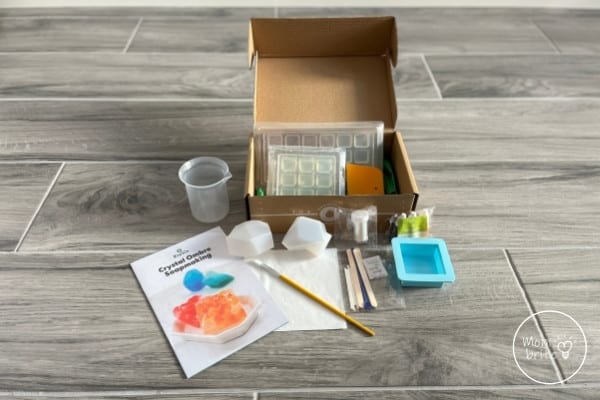
As with all KiwiCo crates, this one comes with a very detailed, illustrated instruction manual. The steps are clear and easy to follow. If it wasn’t for the fact that we needed to use the microwave to melt the soap base, I would have let my 5 and 7 years olds do this activity completely by themselves.
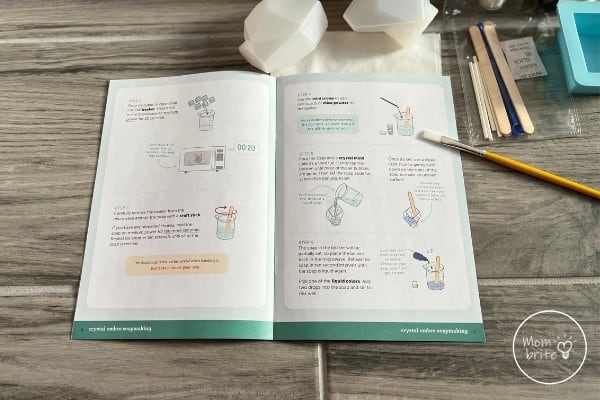
After melting the soap, my kids stirred until all the lumps were gone. Then we added mica powder and the kids were excited to see the shiny flakes in the soap.

It’s a good thing that the kit came with enough materials to make two ombre soaps because my kids were fighting over what colors to use. We finally decided on the blue liquid color first, and we will use the red for the second soap.

My kids had no problem pouring the soap in the crystal mold and I was glad to see that the mold was sturdy and stood up well. I was worried that the mold would tip over and all the soap and our hard work would seep out!
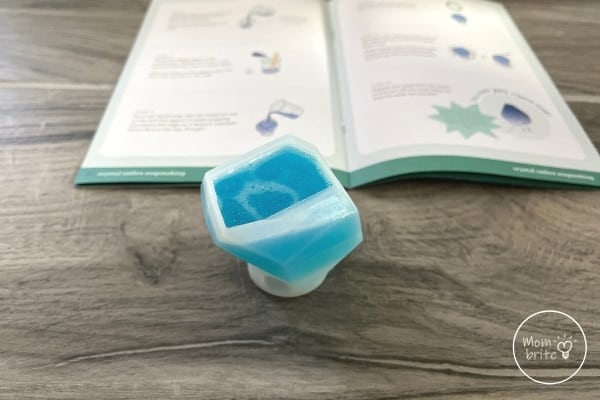
After waiting for an hour, the soap was cool enough to take out. I have to admit, it wasn’t the easiest thing to get the ombre soap out of the crystal mold without damaging the soap. After carefully folding the sides of the molds over, I was able to pop the pretty ombre soap out.
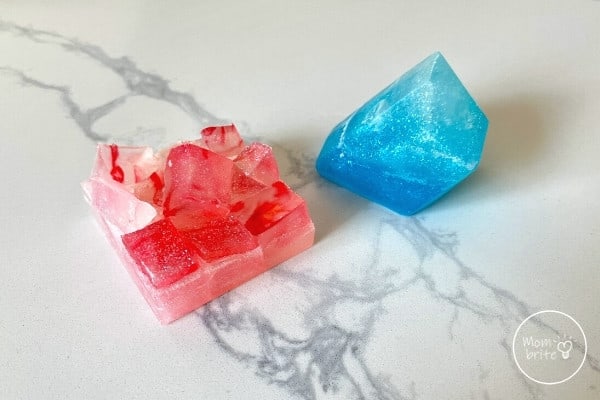
Look how beautiful it is with the mica powder and the different colors!

We followed the instructions to make the crystal soap while waiting for the ombre soap to cool down. This one took longer to make, but we had no issues with the square mold.
My kids loved making these crystal-inspired soaps! I love how I can reuse the molds and leftover mica powder and liquid colors for future soap-making projects.
Review of the KiwiCo Holiday Crates: Christmas Candle Carousel
Wonder how other countries around the world celebrate Christmas? There are so many fascinating holiday traditions out there. If you haven’t done a Christmas around the world unit study with your kids, I strongly suggest it!
Many of today’s Christmas traditions originate from Germany, from the Christmas tree to Santa Claus. The Christmas Candle Carousel, or the Christmas pyramid, from the KiwiCo Store is the perfect way to explore the centuries-old Christmas decoration.
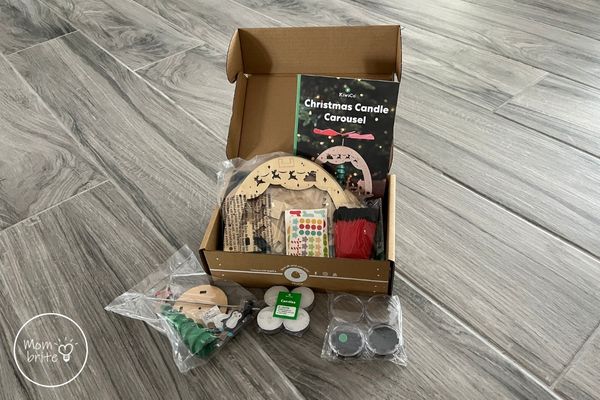
Dating back to the Middle Ages, the Christmas carousel was crafted by miners, who relied on the flames from the candles to ensure good air to breathe down in the mines. The booklet that came with the KiwiCo crate explained the history behind the Weihnachtspyramide – and even included how to pronounce it!
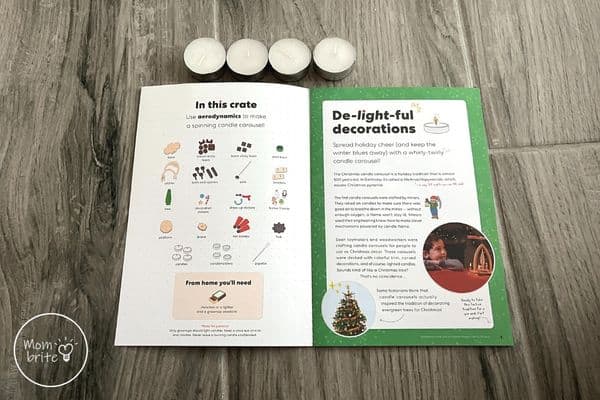
Not only do the kids get a chance to build a mini Christmas carousel, but they also get a chance to learn about the power of aerodynamics that causes the carousel to turn! The candles heat up the air around them, causing the air molecules to start moving faster and faster. As the air molecules bump into each other and start to spread out, they create a gust of wind. The rising air then pushes against the blades of the fan, causing them to spin.
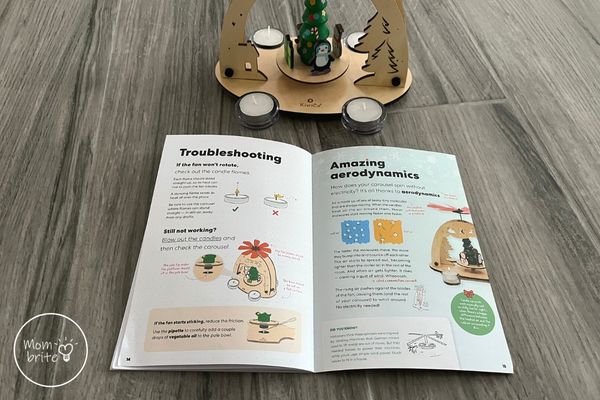
My kids loved building the carousel, and the project gave them some freedom to decorate the Christmas tree and characters to their own liking. Then they were amazed that the fan was turning without electricity!
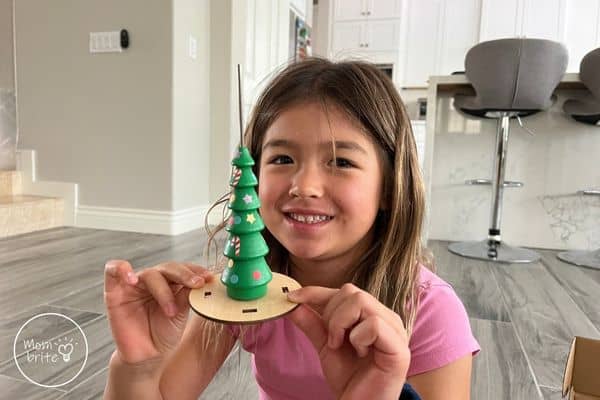
The kids enjoyed learning that the Christmas carousels come in all sorts of shapes and sizes all over the world. A small one can be used as a wind chime that plays beautiful music. The world’s tallest Weihnachtspyramide is in Desden, Germany, and is almost 50 feet tall!

Overall, this KiwiCo Christmas Candle Carousel was a wonderful great STEAM project to get your kids into the holiday spirit. I showed them videos of the Christmas pyramids in Germany and they were amazed at the Christmas tradition. What a great way for the kids to learn about another culture as well as about aerodynamics!
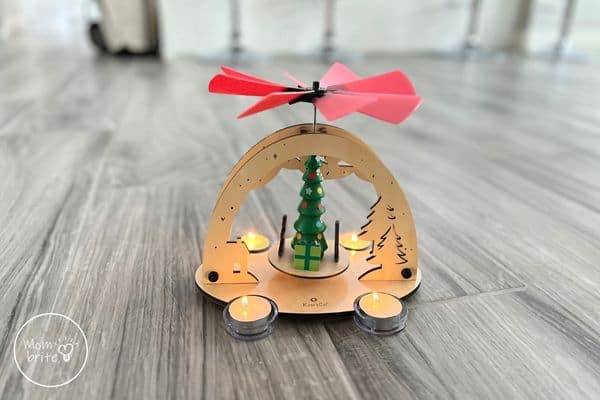
Make sure you check out KiwiCo Store for other fun holiday projects to do with your kids to make this winter an extra exciting one!
How Do I Get Started with KiwiCo?
Especially if you are homeschooling or doing distance learning, the KiwiCo monthly crate subscriptions are great supplements to your curriculum. My kids are so excited when we receive the crate in the mail every month and we have such a good time building and playing with the projects.
Don’t miss out on all the fun! As a Mombrite reader, you can get 50% off your first month’s subscription with code MOMBRITE.
By the way, you can cancel a monthly description anytime after the first crate ships. So there is no risk in trying the crate to see if it’s a good fit for your kids. I have a feeling you wouldn’t want to though after you receive the first box!
YOU MAY LIKE:

Thank you for the great review! Do you recommend that we add the book with the crate? Is it really worth the extra money? I am from Canada so the crate is more expensive plus the shipping it’s a lot.
Hi! What do you mean the book? The booklets come with the crates, if that’s what you mean? Every crate comes with an instruction manual plus a booklet full of information about the science or the art behind the projects.