Looking for a fall craft to decorate your house? These adorable yarn pumpkins made out of balloons, string, and glue will make beautiful centerpieces or mantle decorations for this autumn and Halloween.

Last Christmas, one of my good friends decided she was going to make her own Christmas tree ornaments. She is a crafty person and often tackles DIY projects with much success. Two weeks later, she had her Christmas tree covered with these pretty ornaments made out of yarn! I was super impressed.
As I was sitting here the other day, thinking about what fall crafts to do with my kids, my friend’s Christmas tree ornaments popped in my head. Why not use orange yarn and make a pumpkin using the same method?
Now, before you go out and buy materials for this yarn pumpkin, I want to note that this is not an easy project. It took a lot of running back and forth, glue on the floor, and a few failed pumpkins before I successfully made one.
Also, your kids can try and help, but I would say this is more of an adult DIY project (my daughter did like playing with the glue though). That said, the finished yarn pumpkin is the perfect fall decoration for your home and worth the effort.
How to Make a Yarn Pumpkin with Balloons
Materials:
Directions:
1. Blow up the 12″ balloon about half full and tie the end. You don’t want to blow it up all the way because the shape would be too long and not look like a round pumpkin.
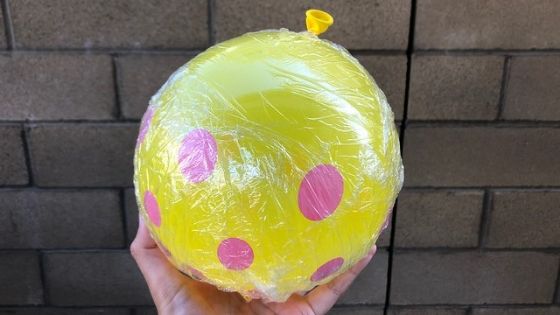
2. Wrap the balloon in saran wrap. This step will save you from peeling the yarn off the balloon later.
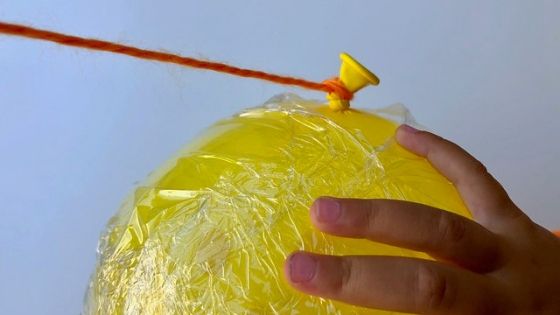
3. Tie a strand of yawn around the knotted end of the balloon.
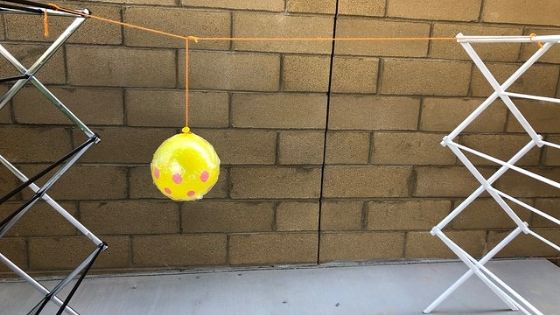
4. Hang the balloon off the strand of yarn.
I tied a strand of yarn in between two cloth drying racks and tied my balloon in between the racks. You can hang the balloon from a cabinet knob, a doorknob, or wherever that is convenient for you.
5. Pour glue into a bowl. If you are using the standard 4 oz bottle, I would suggest pouring about half of the glue out first.
I had some glue leftover after doing one of these yarn pumpkins. So if you pour all the glue out, you might end up wasting some.
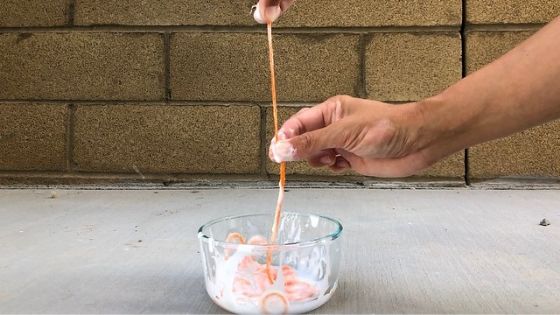
6. Take a strand of yarn, about 2-3 feet in length, and dunk it in the glue.
7. Swirl the yarn in the bowl until you soak it entirely with glue.
8. Ready to get messy? Hold one end of the yarn with your fingers, and then using the other hand, gently run the yarn through your thumb and index finger to get rid of the excess glue.
Don’t try and get all the glue off – you need the glue for the yarn to stick to the balloon and hold the pumpkin shape.
9. Wrap the glue-soaked yarn around the balloon. I try and run the yarn over the loose ends to ensure they are secure, but it’s not necessary.
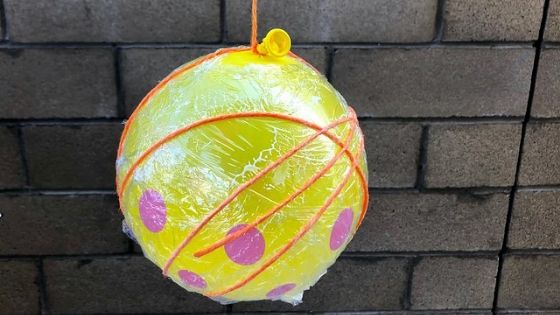
10. Repeat the process until you are satisfied with the amount of yarn on the balloon. Some prefer to cover the entire balloon with yarn, while others prefer to leave some air holes.
11. Leave the yarn-covered balloon for 24 hours to let the glue dry. Don’t try and deflate the balloon before you are 100% sure the glue dried, or else the whole thing will collapse.
The drying time may vary. We live in sunny SoCal with very low humidity so our yarn had no problem drying.
12. Use a knife or scissors, pop the balloon.
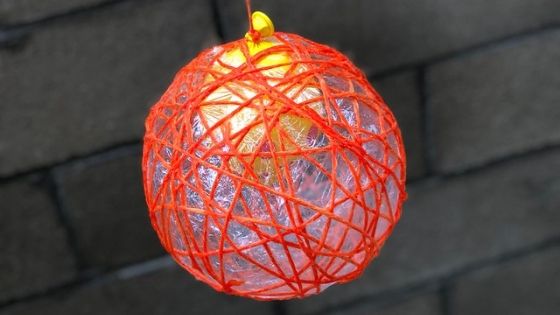
13. Use your fingers and gently push the saran wrap away from the hardened yarn.
14. Make the stem and vine by wrapping pipe cleaners around a pencil (like what we did for the paper plate pumpkin craft).
Ideally, you would probably want to use a brown pipe cleaner for the stem, but I didn’t have any around so I used green pipe cleaners for everything.

15. Insert one end of the pipe cleaners into the pumpkin and rotate them slightly to secure them in place. (If you find that your pipe cleaners keep falling off, then use a hot glue gun to glue them onto the yarn).

How pretty is this yarn pumpkin? Instead of buying real pumpkins and worrying about them rotting, you can use these yarn pumpkins instead to decorate your house for the fall and Halloween.
You can make a bunch of them and tie them to a string and make a pumpkin garland! To make it extra creepy for Halloween, throw some of the pom-pom spiders on the pumpkin!

Tips for Making the Yarn Pumpkin
Here are some tips to save you from failed pumpkins:
- Do not skip the saran wrap. The yarn gets stuck to the balloon if you don’t use the saran wrap and it will take you much longer to separate the yarn from the balloon.
- If you do decide to skip the saran wrap (okay fine but I did warn you), slowly deflate the balloon instead of popping it. Otherwise, the yarn that’s stuck to the balloon will collapse when the balloon shrinks suddenly. Do this by making a small nick near the tied end of the balloon to let the air out slowly.
- Don’t try and deflate the balloon before you are 100% sure the glue dried, or else the whole thing will collapse. You can check if the glue is dry by gently feeling the yarn around the balloon. When in doubt, wait longer.
- These yarn pumpkins look like balls so your kids will be tempted to throw them around, but they are more delicate than they look. If you want them to stay intact for Halloween, then keep them away from the kids.
- I know you are tempted to wrap the yarn around the balloon and apply glue afterward. Trust me – it’s a lot harder this way. I tried and tried, and the yarn kept getting loose and falling off the balloon as I wrap. The glue is necessary to keep the yarn on the balloon.
Are you looking for more Halloween crafts? Try this flying paper tube bat that your kids can play with plus you can use as a Halloween decoration!
We also love making Halloween handprint crafts to capture the little hands while they are still small. Some of our favorites include this easy pumpkin handprint craft and this adorable bat handprint craft.


How can you make them for outside?
Hi! Yes you can, but consider the humidity and heat. This time of the year should be okay, but if you are in a really hot and humid climate the glue might soften.
Hi. Can we use clear glue for this project as well?
Yes I believe so! I think the white glue makes it easier to see when the glue is completely dried but you can use the clear glue as well.
how do you get the balloon and saran wrap out of pumpkin?
Once you pop the balloon the saran wrap should come away from the balloon, and you can pull it out through one of the holes.