Explore the classic baking soda and vinegar chemical reaction with this fun and thrilling exploding lunch bag experiment that will have your kids squeal with glee!
When it comes to activities that kids love, nothing can beat exploding science experiments. Kids love the visual effects of the chemical reaction and the anticipation of the explosion.
This exciting exploding lunch bag science experiment is easy to set up but brings about tons of fun. Just make sure you do it outdoors to avoid a mess on your floor!
And if you still have baking soda and vinegar leftover from the LEGO volcano and apple volcano activities, then here is another one you can use them for.
If you are doing this with a group of kids or in a classroom, expect a few kids to scream when the bag explodes. The sound is quite loud! You may want to tell the kids with more sensitive hearings to cover their ears.
Exploding Lunch Bag Experiment
Materials:
- Sandwich bag (make sure it has a good seal)
- 2 tablespoons of baking soda
- ½ cup of vinegar
- ½ cup of warm water
- Tissue
- Optional: Food coloring
Instructions:
- Add ½ cup of warm water and ½ cup of vinegar in the sandwich bag.
- Optional: Add a few drops of food coloring to the water/vinegar solution.
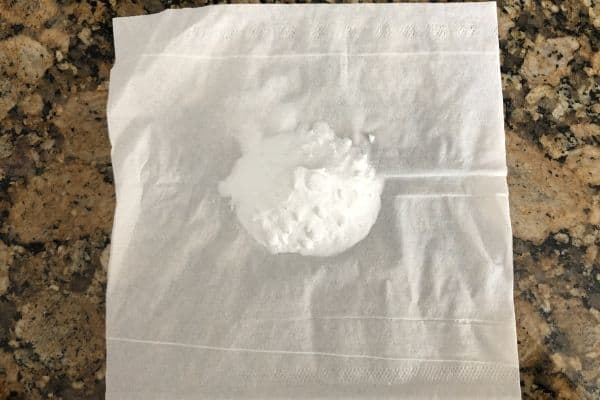
- Lay a tissue flat on the table and add 2-3 tablespoons of baking soda in the center.
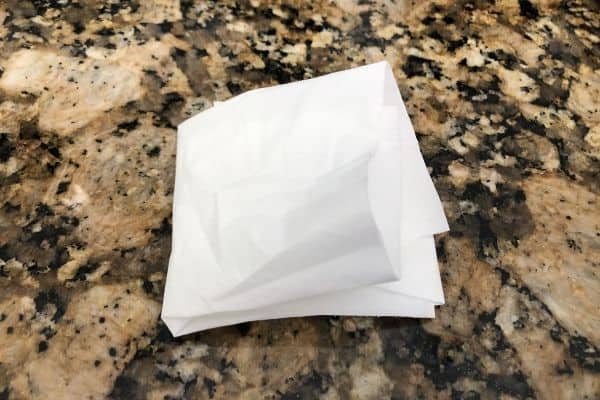
- Wrap up the baking soda inside the tissue by folding the tissue into a little square with the baking soda in the middle.
- Go outside (or do this experiment over the kitchen sink or bathtub) so the explosion doesn’t get all over the floor.
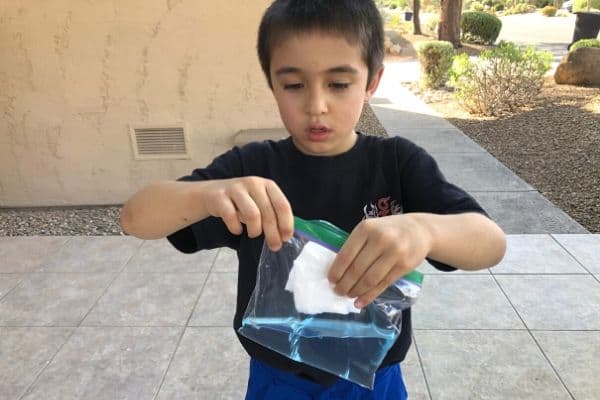
- Open the bag and insert the baking soda packet carefully. Hold the packet above the liquid while you zip the bag all the way closed.
- Once the bag is sealed, drop the baking soda packet in the liquid and shake the bag a few times.
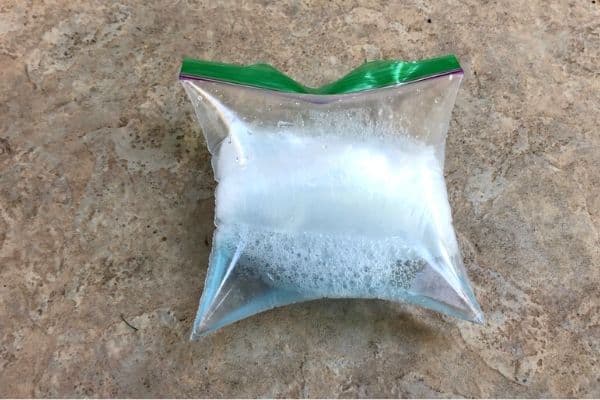
- Gently place the bag on the ground and watch the bag fill up with gas.
- Step back and watch the bag get bigger and bigger until it pops!
Did you scream when the bag exploded? I did! I knew it was coming but for some reason, the loud pop still surprised me.
My kids loved it! They were so anxious when the bag started to fill with gas, and I lost count of how many times they asked “Is it going to explode? Is it going to explode?” Then when the bag did pop, they jumped in delight!
We only shook the bag a little before putting it down on the ground, and it did take a long time for the bag to inflate. We got impatient and picked up the bag and shook it some more to speed up the process.
That said, when we did the experiment a second time, we shook the bag way too violently. The bag almost exploded in my hand! Lesson learned … patience is a virtue.
The Science Behind the Exploding Lunch Bag
At the first glance, the exploding lunch bag experiment seems like another baking soda and vinegar experiment. However, this particular experiment is different than the volcano experiments we conducted earlier. Can you guess why?
For the volcano experiments, we have the baking soda in the volcano, and we added vinegar to make the explosion. In this experiment, we did the reverse – we dropped the baking soda in the vinegar.
When you add baking soda to vinegar, not all the baking soda touches the vinegar right away. Some baking soda sits on top while waiting for the rest of it to react with vinegar. Therefore, the reaction is slower than if you pour vinegar on baking soda and cover all the baking soda right away.
We also slowed down the acid-base reaction by putting the baking soda in a tissue. This was necessary to buy time while you set the baggie down on the ground. The last thing we want is to have the sandwich bag explode in your face!
You can read more about the baking soda and vinegar chemical reaction in the LEGO volcano experiment here.
Experiments to Try
Here are some extensions to try with your kids. Trust me, they will want to do all of these just to watch the baggie explode again!
- Use hot or cold water instead of warm water. Does the temperature of the water affect how fast the bag inflates?
- Use a different size sandwich bag. Did the bigger bag inflate slower than the smaller bag?
- Add more or less baking soda in the tissue. How did the amount of baking soda affect the explosion?
- Try omitting the water and pour just vinegar in the bag. How did this change your experiment?
- Use a paper towel or toilet paper instead of tissue. Did the type of paper you use to wrap the baking soda matter?
- Try doing the experiment once without shaking the bag at all. Did the bag pop eventually? How long did it take?
Final Thoughts on the Exploding Sandwich Bag Experiment
If you do have food coloring in the house, I do suggest you put food coloring in the liquid so that you can see the explosion better. The kids also liked choosing their own colors for their baggies.
You can also draw on the bag to make it more fun. In the wintertime, we used a permanent marker and drew a snowman’s face on the baggie to make an exploding snowman!
Of course, after this experiment, my kids are wondering what else we can explode. Stay tuned for some explosive science experiments, coming up!
YOU MAY LIKE:

Hi there, I like your science experiment. CAN I HAVE MORE SIMPLE EXPERIMENT FOE PRESCHOOL SECTION
Thank you! If you look under the science section (from the menu), most of the experiments are for preschoolers and kindergarteners!