This lovely DIY glue suncatcher craft is perfect for adding a touch of color to your home. Your kids will have so much fun mixing food coloring and creating beautiful patterns in the glue.
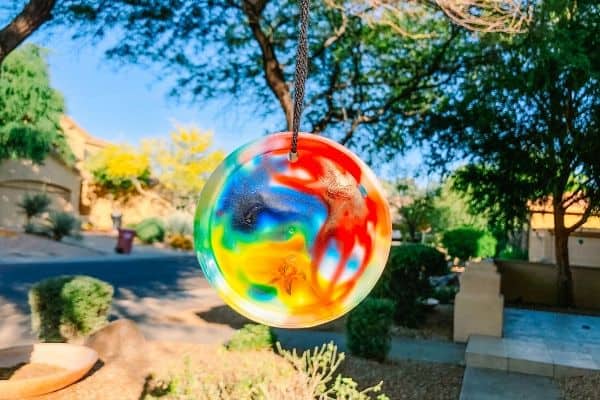
We have two giant containers of glue at home because we have been making slime.
But after my son threw the slime at my daughter and got her hair covered in slime, we decided to take a break from all the gooey mess. Slime is definitely not mommy’s favorite craft.
Making colorful suncatchers by painting on wet glue is a much easier activity and a lot less mess. It takes about 5 minutes for each glue suncatcher and then you just need to wait for the glue to dry!
This DIY suncatcher craft makes stunning decorations for your windows at home. You can also hang them outside on the tree branches and share them with your neighbors.
How to Make Suncatchers with Glue
Materials:
- Elmer’s white glue
- Food coloring or liquid watercolor paint
- Toothpick
- Plastic lid (the lid needs to be flexible enough so you can bend it to get the suncatcher out)
- Hole punch
- String
Instructions:
1. Pour enough glue into the lid to cover the entire inner surface. The best lids to use are flexible lids from yogurt, hummus, sour cream, or guacamole containers.
2. Add drops of food coloring. **Tip: About 3 drops is more than enough.
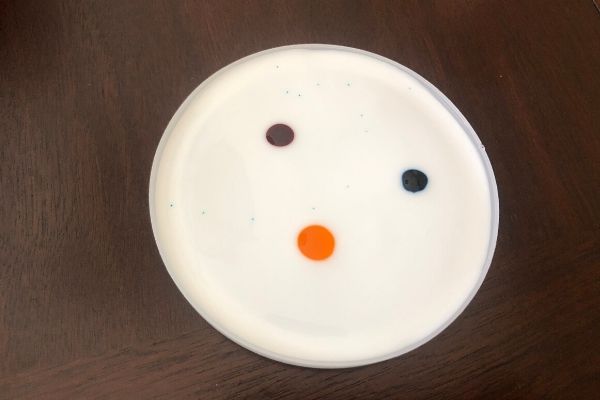
3. Swirl the colors around the glue with a toothpick. Let your kids be creative and make beautiful patterns in the glue.
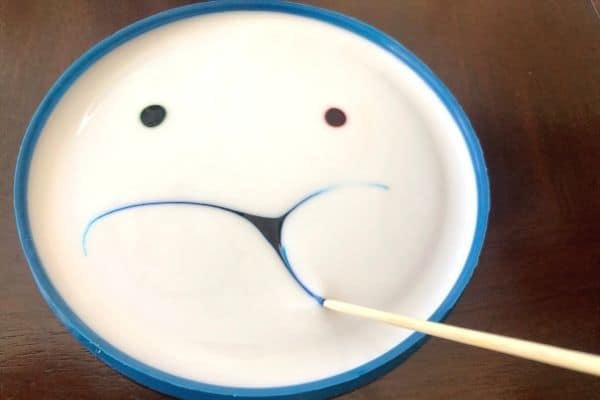
4. Let the glue dry until completely solid. Depending on how much glue you poured in the lid, it may take 2-3 days.
This is the hardest part of this glue suncatcher craft. My kids checked on the glue every few hours and every time, they were 100% convinced that the glue had dried all the way.
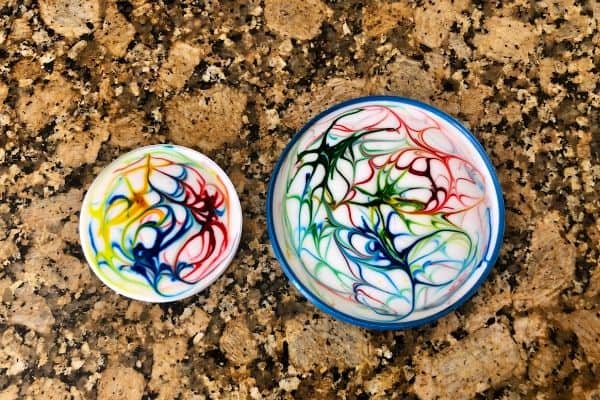
5. When you see the edges starting to peel off the lid, you can peel off the glue.
6. Punch a hole in the suncatcher with the hole punch.
7. Insert the string into the hole and tie the ends.
8. Hang the suncatcher in a sunny spot. We tied ours to the tree branches outside and the bright sunlight going through the translucent suncatchers was just so beautiful!
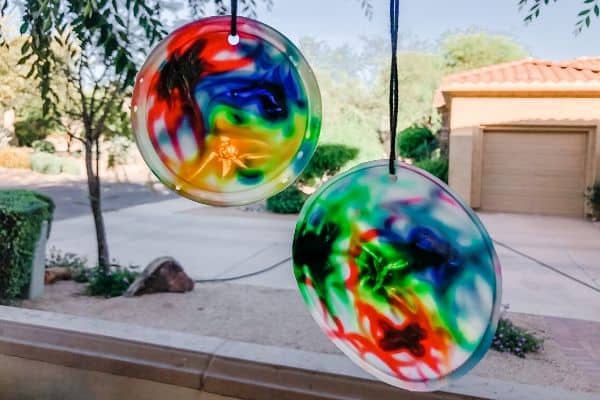
My kids had a lot of fun making the DIY suncatcher. They say it’s one of their favorite crafts we have done so far!
You do have to watch your kid while he/she is swirling the food coloring with the toothpick. If you leave them alone, I have a feeling all the colors will be mixed together by the time you return and you will end up with a brown suncatcher.
We found that the yogurt lid worked the best for the suncatcher. We did a bigger one but because of its size, it tends to curve and bend. It also took longer to dry.
I would recommend setting your glue to dry somewhere higher up. Your kids will be very tempted to touch it while it’s drying and their little fingers may ruin the suncatcher!
Final Thoughts on the Painting on Wet Glue Suncatcher
My kids really enjoyed making their own colorful glue suncatcher. They are amazed by how when the white glue dried, it became clear.
If you are making this glue suncatcher in the summer, you may want to hang them indoors. The hot summer heat can cause the glue to soften and bend, or worst case, melt the glue.
We are going to try more of these glue suncatchers because it was so easy and fun. I wonder what will happen when we try clear glue? Or glitter glue?
Stay tuned!
YOU MAY ALSO LIKE:

So my grandkids and I made these and they turned out great, except they curl up. Help!!
Hello!
If you put them in warmer places, they will probably curl up. How big are the suncatchers? If you make them in bigger lids, they will probably curl unless you put enough glue so that it’s nice and thick so they won’t curl. I recommend doing smaller lids (like yogurt) and just make sure you use enough glue. They are so pretty! 😀 Hope that helps!
Will this work with clear glue?
I would imagine so, but you won’t be able to see the colors as clearly as with white glue.
Gotta try this with the grands, they love anything with glue. I love the idea of glitter glue. We don’t have that, but lots of colors of glitter. I think I’ll try adding a bit of that.
This one is super fun! Yes add glitter and see what happens! Just a word of caution, I am not sure where you live but it’s possible that the heat is too much right now for this craft. I am in Arizona and the over 100 degree weather would definitely make the glue melt!
Just tried this with my grandkids. Didn’t have plastic covers so used paper drinking cups. I’m concerned we may have put in a bit too much glue. I’ve put them up high out of reach and hope they will dry. I also hope that we can peel them out. Fingers crossed.
If you used too much glue it just takes longer to dry! I hope they turn out well :).
What kind of lids do you use? Does it have to be a bendable lid?
We used yogurt lids, but you can use any lid with a rim. The lid doesn’t have to be bendable but it certainly makes it easier to take out the suncatcher after the glue dries.
I’m going to try them with clear plastic wedding plates. We will see what happens!
I am going to give this a try! We have silicon molds for melt and pour soap, in fun shapes. This would be super cute in bees and flowers!
hi
do you use plastic lids that are like cloudy in color or glass lids
please help
I used plastic lids, like from a yogurt container
How did you get the swirl lines to stay? Gel food coloring? We tried this with liquid food coloring and clear glue and white glue. The swirl lines always mix and disappear as it dries… our circles always end up being one color
It might depend on your food coloring. I find that natural food coloring doesn’t stay as well.