For your little LEGO® fans, I bet they are very grateful for all the LEGO bricks they have at home! Let’s put the LEGO pieces they have collected over the years to good use by building a LEGO turkey for Thanksgiving!
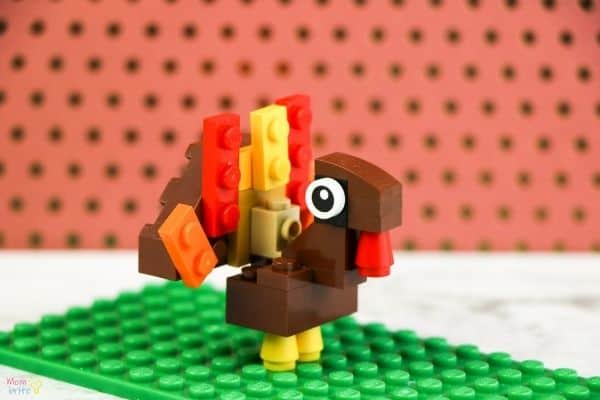
There are so many ways you can build a LEGO turkey, and the instructions below show just one of the ways. If your kid doesn’t have some of the pieces listed below, have him use his imagination and replace the missing pieces with something else that he has at home. That’s the beauty of building LEGO creations – there is never a right answer!
How to Build a LEGO Turkey
Materials:
- 2 brown 3×3 ¼ circle bricks
- 1 yellow 1×2 flat plate with knob
- 1 brown or gold 2×2 flat plates with knob
- 2 orange 1×2 plates
- 1 red 1×1 nose cone
- 2 yellow 1×1 nose cones
- 2 1×1 round eyes
- 1 brown 1×2 brick with bow
- 1 brown 1×1 plates
- 1 black or brown 1×1 brick with 2 knobs
- 1 brown 1×2 45º roof tile
- 1 brown 3×3 cross plate
- 1 brown 1×3 brick
- 1 beige 1×1 brick with knob
- 2 red 1×3 plates
- 1 yellow 1×2 plate
Instructions:
- Align the two 3×3 ¼ circle plates. Over the seam, press the yellow 1×2 flat plate with knob and the brown or gold 2×2 flat plate with knob to secure the two circle plates.
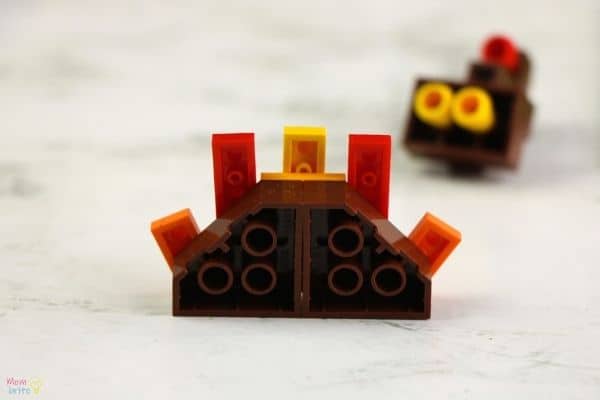
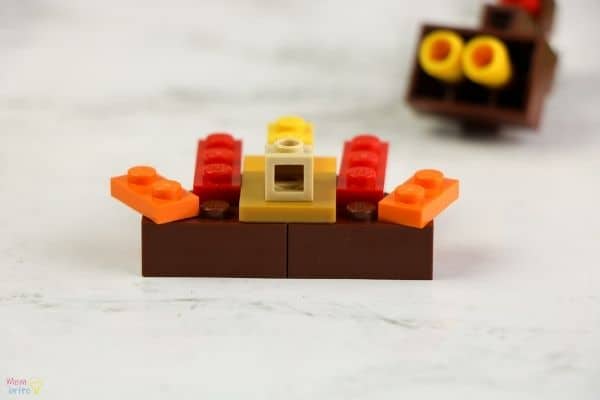
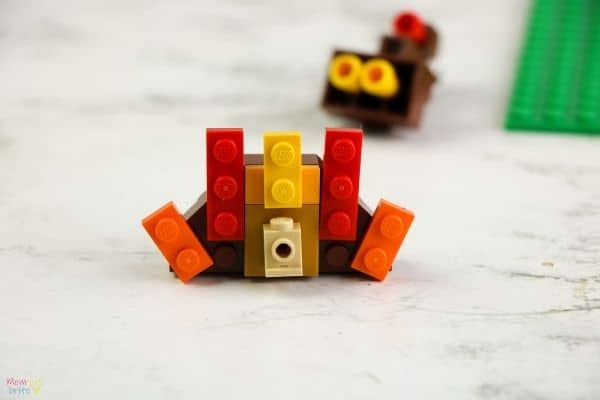
2. Add one 1×2 orange plate to each corner of the 3×3 ¼ circle bricks. On the next knob on each side, add the red 1×3 plates. Finally, over the 1×2 plate with knob in the middle, add the 1×2 yellow plate. Now your LEGO turkey has tail feathers! Add the 1 beige 1×1 brick with knob on the brown 2×2 flat plate with knob. This will connect to the turkey’s body.
3. For the body of the turkey, place the cross plate on the 2×3 brick with one end of the cross plate extending to become the base for the turkey neck. On the back of the cross plate, add the 1×1 brick with knob. This will be the connection to the tail.
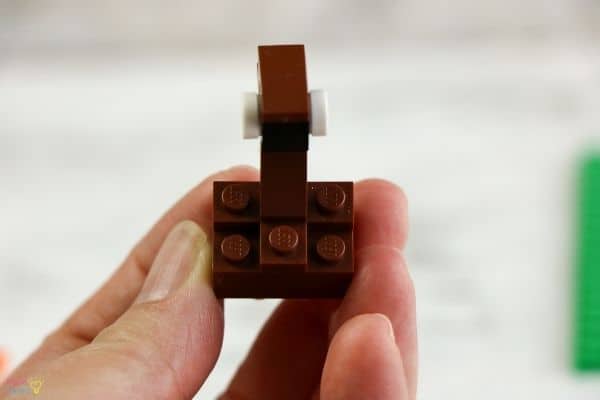
4. For the turkey neck and face, stack the 1×2 45º roof tile on the extended portion of the cross plate with the angle sliding towards the tail. On top of the roof tile knob, add the black (or brown) 1×1 brick with two knobs. Add an eye to each knob.
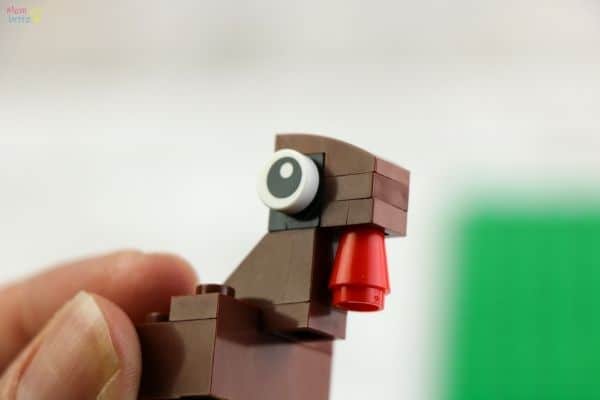
Snap the brown 1×2 brick with bow over the top of the black 1×1. Squeeze the two 1×1 plates together to form a cube and snap it under the bow. Attach the red nose cone under the cube to be the turkey’s waddle.
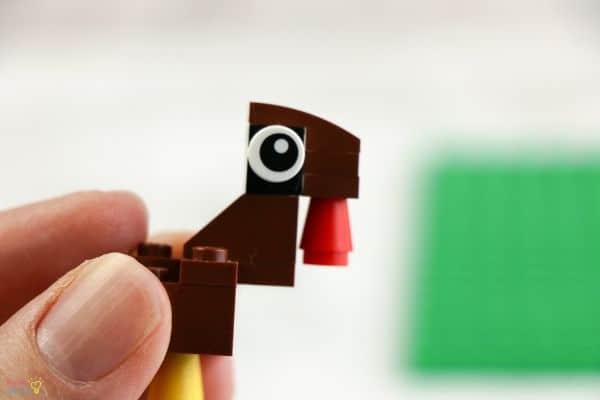
5. Attach the two yellow nose cones under the 2×3 brick as the turkey’s feet.
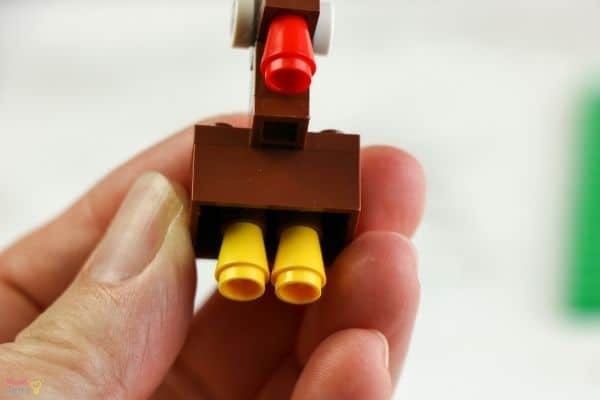
6. Attach the LEGO turkey’s body to the tail feathers.
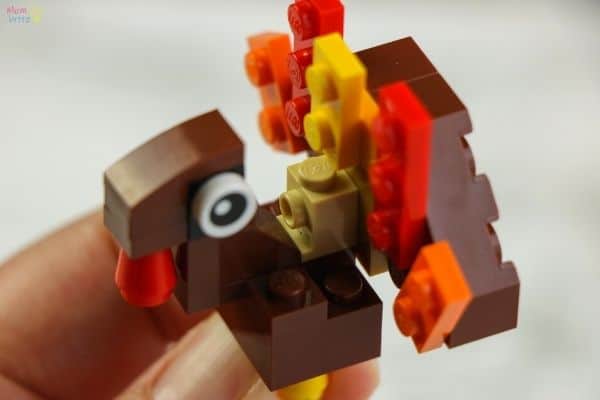
How cute is this LEGO turkey? To make sure it stands up without tilting over, attach it to a baseplate. Now you can display it anywhere you like!
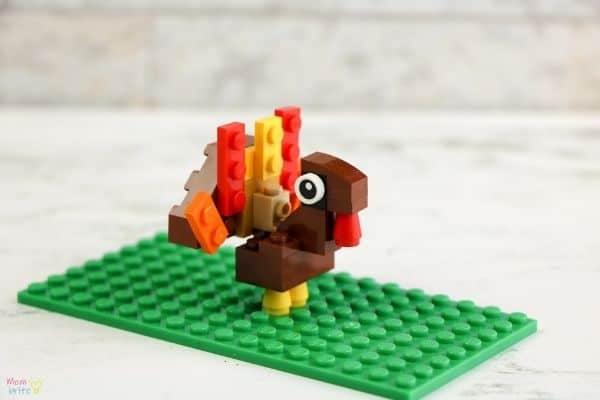
Your kid will be so proud that he made a LEGO turkey that can be used to decorate the table for Thanksgiving. Place it next to some mini pumpkins on a wooden board and you have the centerpiece of the table!
Happy Turkey Day!
YOU MAY LIKE:

