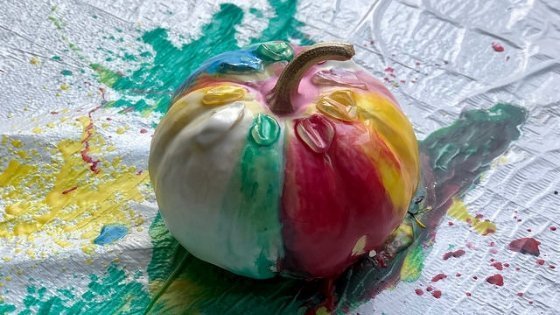
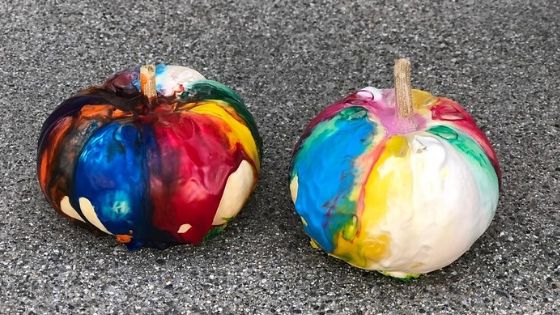
Melted crayon pumpkin is the perfect activity for the fall. Your kids will love this fun and easy no-carve pumpkin decorating activity!

My kids love crayons for any other activities EXCEPT drawing. For example, they like launching them in the air or stepping on them. Needless to say, we have tons of broken crayons in the house. Hence, when it comes to decorating pumpkins for Halloween this year, I was determined to use up those broken pieces of colored wax.
Of course, trying to draw on the pumpkin with crayons didn’t work. Shoot me for trying to take the easy way out. Then, I saw a video on melting crayons using a blow dryer onto a canvas to create an original piece of art. Genius! Off we go to attempt the same but on a pumpkin! My kids ended up loving it so much that I think we will make this melted crayon pumpkin activity a Halloween tradition.
What you need:
- Pumpkin (I got the little ones from Trader Joe’s)
- Crayons (God bless you if you don’t have any broken ones and need to purchase new ones for this activity)
- Hot glue or clear tacky glue
- Blow-dryer
- Plastic bag
Steps:
- Lay down a plastic bag or a large piece of paper to protect your floors. Trust me, the wax will splatter, and you don’t want to be scrapping crayon off your floor.
- Peel off the paper from the crayons. I had my kids do this to work on some fine motor skills… plus it gave me a few minutes to wash the dishes.
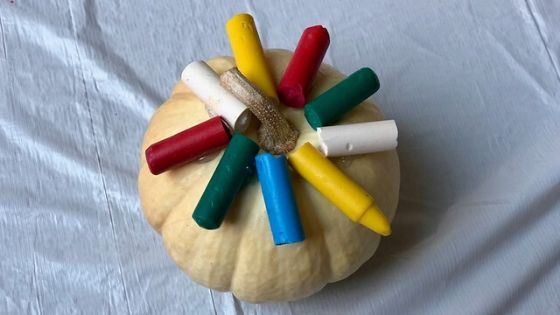
- Glue pieces of crayons on the pumpkin. Trust me, don’t skip this step. Your crayons will fly off if you don’t glue them on. It doesn’t really matter what color you use or what order you put them in, all up to you.
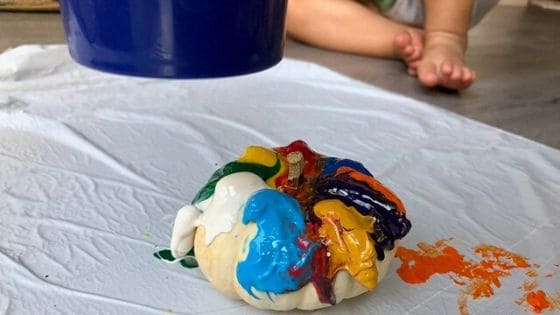
- Start blow drying the crayons until they melt and wax starts to run down the pumpkin! Try holding the blow dryer at different angles so that the colors blend into each other and cover more of the pumpkin.

We talked about the different colors and what colors may go better next to each other on a pumpkin while waiting for the crayons to melt. My son was curious why brown seemed to be an unpopular color, and why white is technically not a color. This melted crayon pumpkin activity is definitely up there when it comes to my list of activities to do with my kids. However, I did make a couple of mistakes along the way, and I want to share so that you don’t do the same thing I did!
- Take off any attachments on the blow dryer. The first pumpkin we did I had the diffuser attachment on (I think? I never used the blow dryer on my hair, so I am not sure what the attachments actually do.) and it took FOREVER for the wax to melt. Good thing my kids were happily doing the bow pose while waiting. For the second pumpkin I took off the attachment and it took less than 30 seconds before the wax started melting.
- If you are using new crayons, break them in half or at least make them shorter. If you use long pieces of crayons, the wax will just drip on the floor instead of on the pumpkin.

The kids loved this melted crayon pumpkin activity, and to be honest, I loved it too. It is so fascinating to watch the wax melt and drip down the side of the pumpkin. Plus, unlike using markers or any water-based paint, you don’t have to worry about the pumpkin sitting outside and getting wet because the wax is water-resistant! The kids were so proud of their pumpkins and kept saying how pretty they are. Maybe we will get a couple of big pumpkins and use up the rest of the broken crayons in the house!
How are you decorating your pumpkins this year?


This pumpkin decorating is great. I want to show my daughter and see if she wants to try it with one of our pumpkins this year.